How to customize your menu
Most Main Street Sites templates support custom menus. Custom menus allow our customers to have complete control over the menu on their site.
Custom menus allow you to replace the standard menu:

With a menu you define yourself, like this one:

To begin working on a custom menu, go to Website > General > Site Options > Custom Menu tab.
Note: This tab will only appear if your template supports custom menus. Some of our older templates do not support this feature.
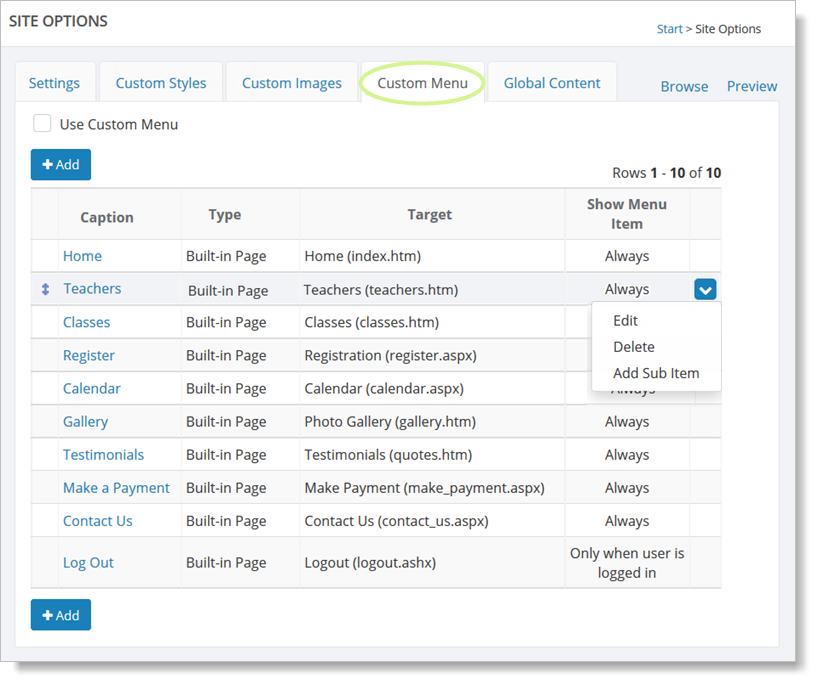
You will need to enable this feature for your site to use your custom menu. Select the "Use Custom Menu" box. Main Street Sites displays a message confirming that custom menus can now be used. You can work on your menu first and enable this later if you would like.
To edit or delete a menu item, hover over it and click the blue down arrow on the far right. This action displays a drop-down list with both the "Edit" and "Delete" commands. You can also edit a menu item by clicking the menu item name. This action takes you to Edit Custom Menu Item.
Click the "Add" button to add a new custom menu item. You will be presented with Add Custom Menu Item to fill out (shown below). Enter the information about the menu item and click the "OK" button to add the menu item to the list.
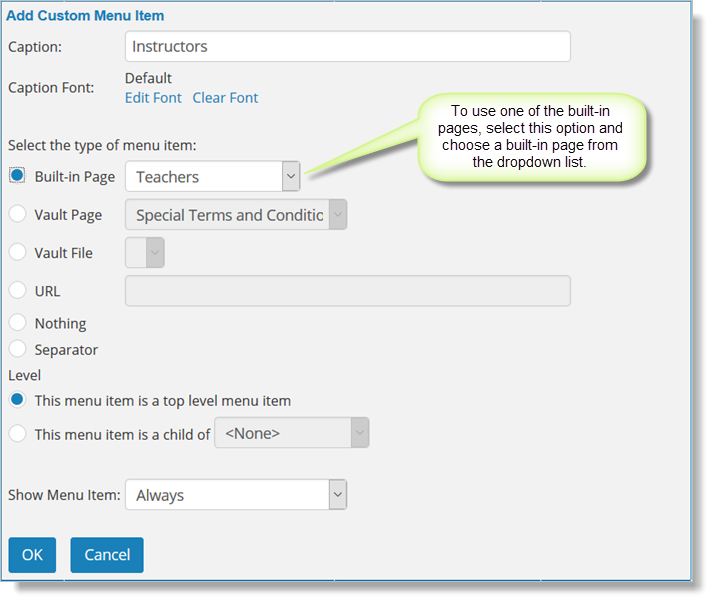
The most common things to put in your menu are menu items that point to the built-in pages for your site. You'll probably want a link to the About Us page, the Registration page, the Gallery Page, etc. (You don't need to have any of these pages in your menu if you don't want to use them.)
Below is an example of adding a built-in page to your menu. You can set the caption for the item to whatever you like.
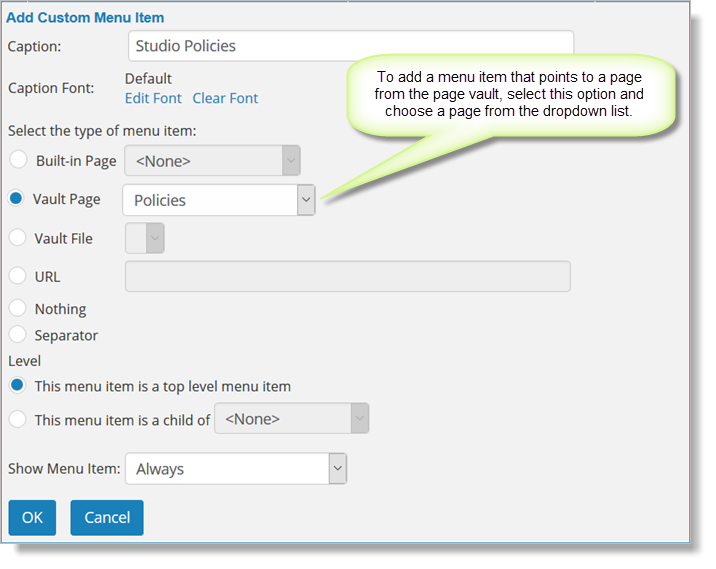
You'll probably want to add some menu items that reference your Page Vault pages. Below is an example of a menu item that points to a Page Vault page.
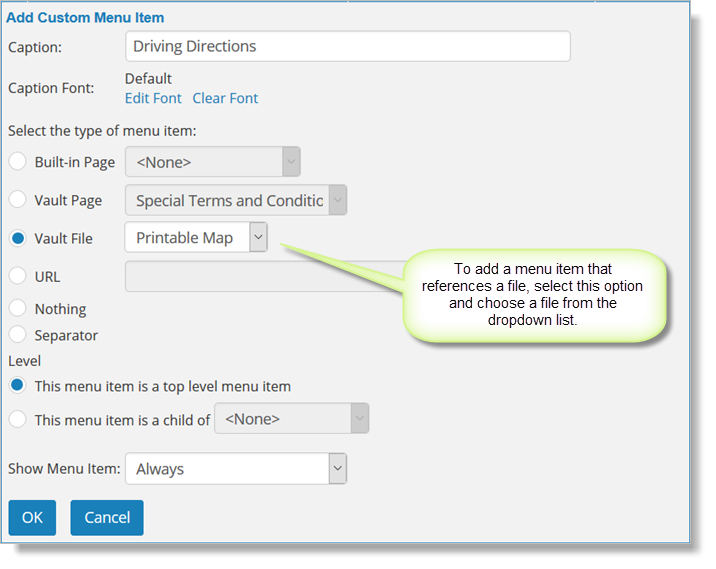
You can add menu items that reference files in your File Vault too, like this example:
You can even reference pages on other websites if you would like, like this one:

Creating sub-menus
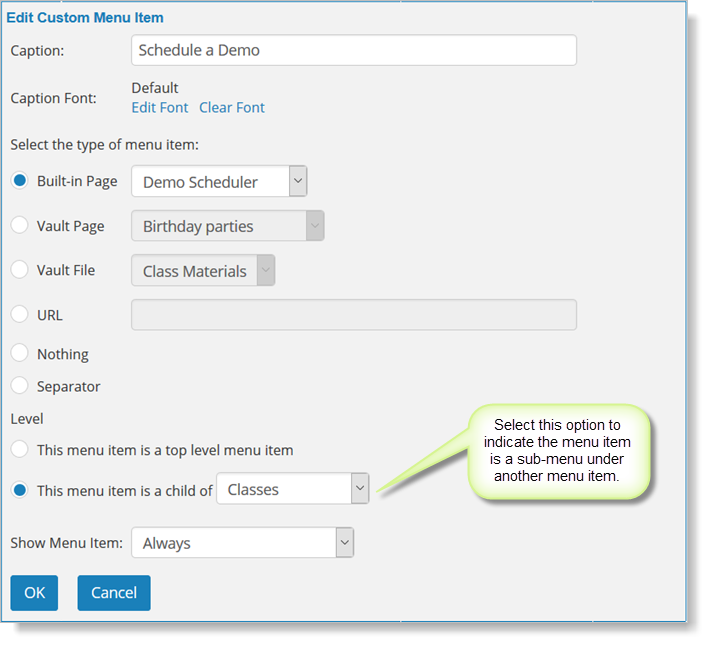
All of the examples above created top-level menu items. If you want to create some drop-down menus, just add some items that are "children" of your other menu items.
Note in the example below, the section called "This menu item is a child of." Here we are telling the menu editor to show the "Schedule a demo" item underneath the "Classes" item.
If you find the parent item in the menu grid and click on the "Add Sub Item" command, this value is automatically set for you.
When you are done creating your menu, your menu grid will look something like this:

The grid shows what page each menu item is pointing to, and shows you any sub-menu items you have created by indenting them.
Note that you can sort your menu items. Hover over a menu item and select the up and down arrows to the left of the menu item name.