How to set up classes for Online Registration
In order to prepare your classes for online registrations and payments, you'll need to specify how many seats are open for each class and which classes are open and closed. Go to Manage > Classes > Classes.
When you look at the Classes page, you can see columns for Code, Seats and Status. This information is used in Online
Registration. (Please note that these columns will not appear for
accounts that are not configured for Online Registration.)
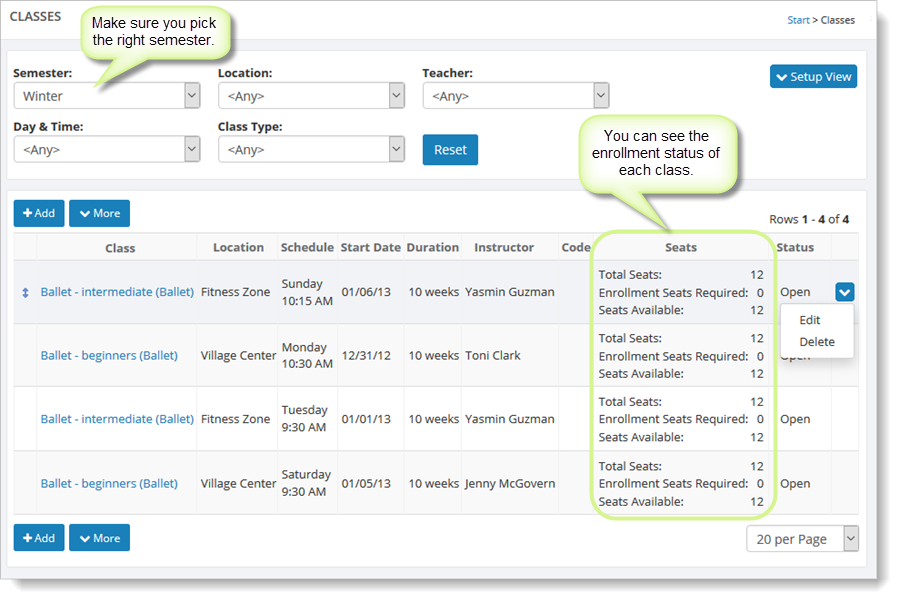
To change values for a given class, hover over the class and click the far right blue down arrow. Select the "Edit" command.
The number of Total Seats and Outside Registrations dictates how many seats can be registered and paid for online. Total Seats is the number of seats available in the class, and Outside Registrations is the number of seats that have been taken by any registrations you are not tracking in the Back Office system. If you put a Total Seats of 5 here, and leave Outside Registrants at 0, then the Online Registration system will accept registrations for 5 seats and then automatically mark the class with a status of Closed.
Note: Most users of Back Office will choose not to use "outside registrants" for a class, but instead they will add the customer's account and enrollment by going to Manage > Accounts > Accounts.
This image shows where you can update the seat information for a single class:
As online registrations come in, the seats available information is automatically updated and displayed on the Classes grid.
Updating all classes at once with seat information
When updating seats for all of your classes, you can save time by using the "Update All Classes" command, which is available on the Classes grid by clicking the "More" button. This feature will allow you to update the values for all of your classes at once, as show here:
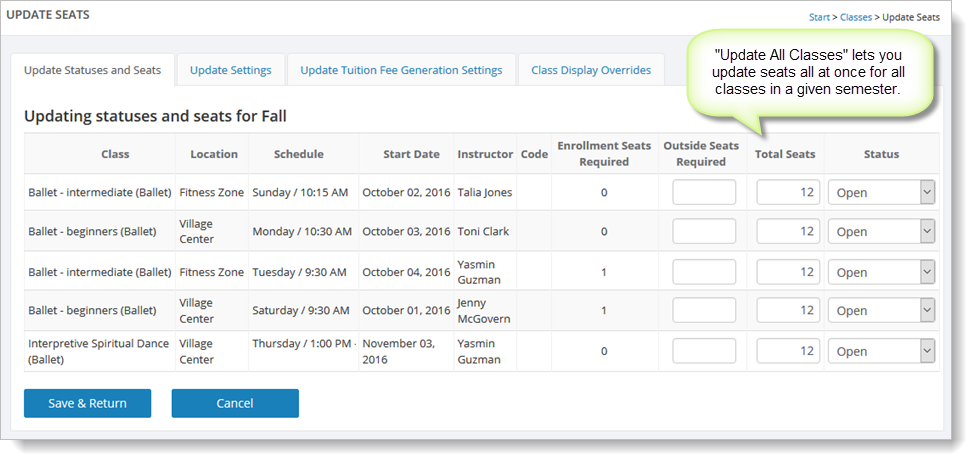
Make your changes and click on the "Save & Return" button to commit the new values to the system.