How to set up locations for appointments
In order to schedule appointments, you need to define room and availability information for each location. To do this, go to Setup > General > Locations.
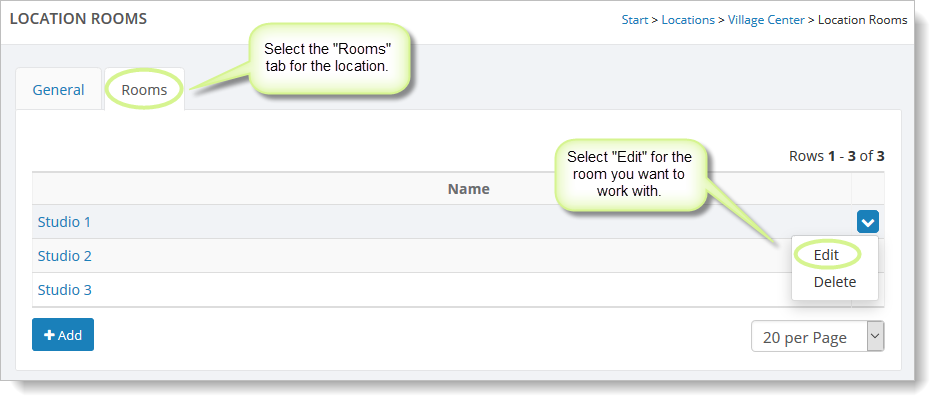
Search for and open the relevant location. Click on the "Rooms"
tab.
On the grid, hover over the room and click on the far right blue down arrow. Select the "Edit" command.
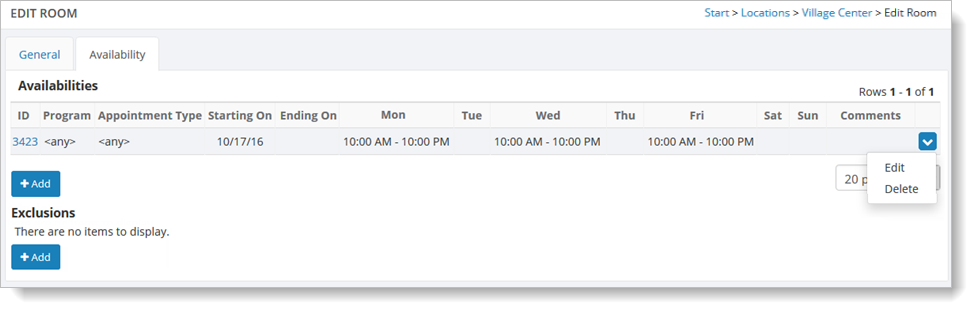
You will see any existing availability schedules or exclusions for the room.
Adding availability
In the "Availabilities" section, select the "Add" button. You will see a blank form to fill out:
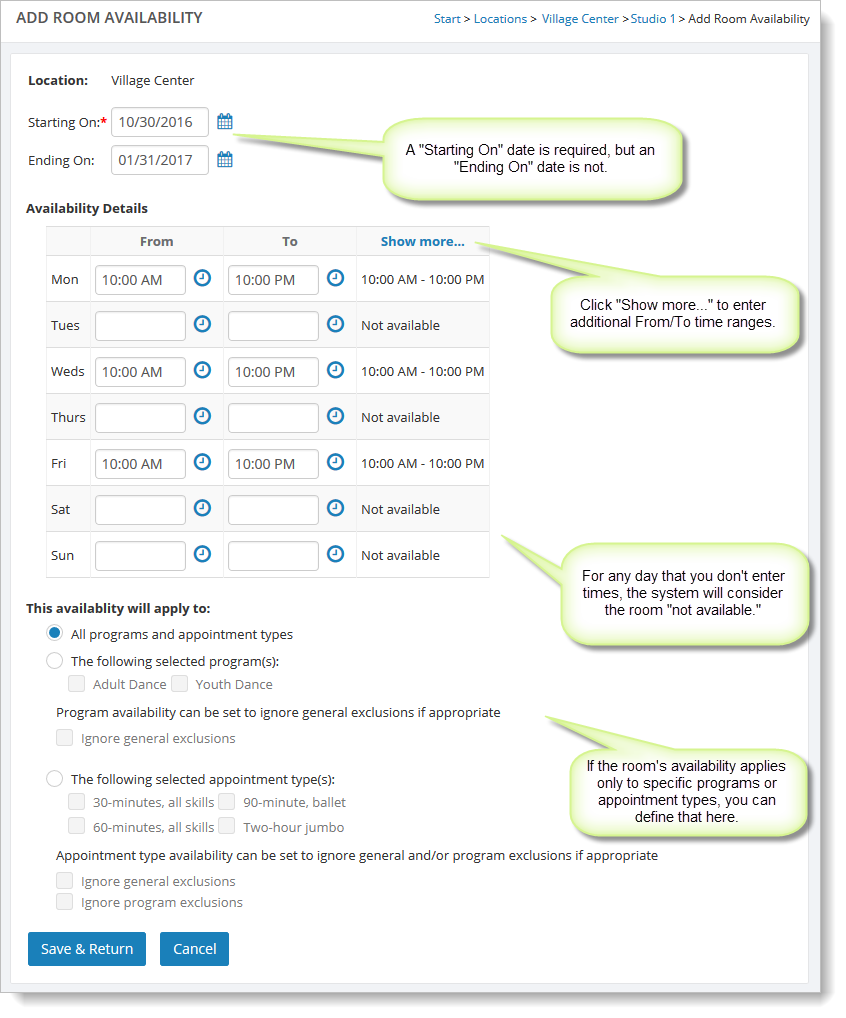
The "Starting On" date is required. If the room's availability will
change after a certain date (for example, at the end of the year), you
can select that date in the "Ending On" field.
In the "Availability Details" area, you can define the days of the week and the time ranges
when the room is available. In the example above, the room is
available on Mondays, Wednesday and Fridays from 10:00 AM until 10:00
PM.
If you need additional time ranges for a day, click "Show More" in
the upper right of the grid, and you will see more "From - To" time
range columns.
If the room availability defined in "Availability Details" applies to all programs and all appointment types, you can simply leave the first option selected and click on the "Save & Return" button.

Otherwise, you can use the options in this area to select a specific program or appointment type to which this room availability applies. For example, you may only want to use this room for the Adult Dance program.
You will see a checkbox in this area that refers to ignoring exclusions. This allows you to set up the room availability so that it ignores any
exclusions set up. To enable this, you will need to select the appropriate checkbox. For more information on exclusions, see the following section.
When you are done on this page, select the "Save & Return" button.
Adding an exclusion
When you create an availability schedule for a room, you can
also create exclusions. These exclusions can apply to every day of the week, only specific days/times, or only to certain programs or appointment types.
To set up exclusions, go to Setup > General > Locations.
Search for and open the relevant location. Click on the "Rooms"
tab.
On the grid, hover over the room and click on the far right blue down arrow. Select the "Edit" command.
In the "Exclusions" section, select the "Add" button.
You will see a blank form to fill out. (This form is nearly identical to
the one for adding availability, which was explained in the previous
section.)
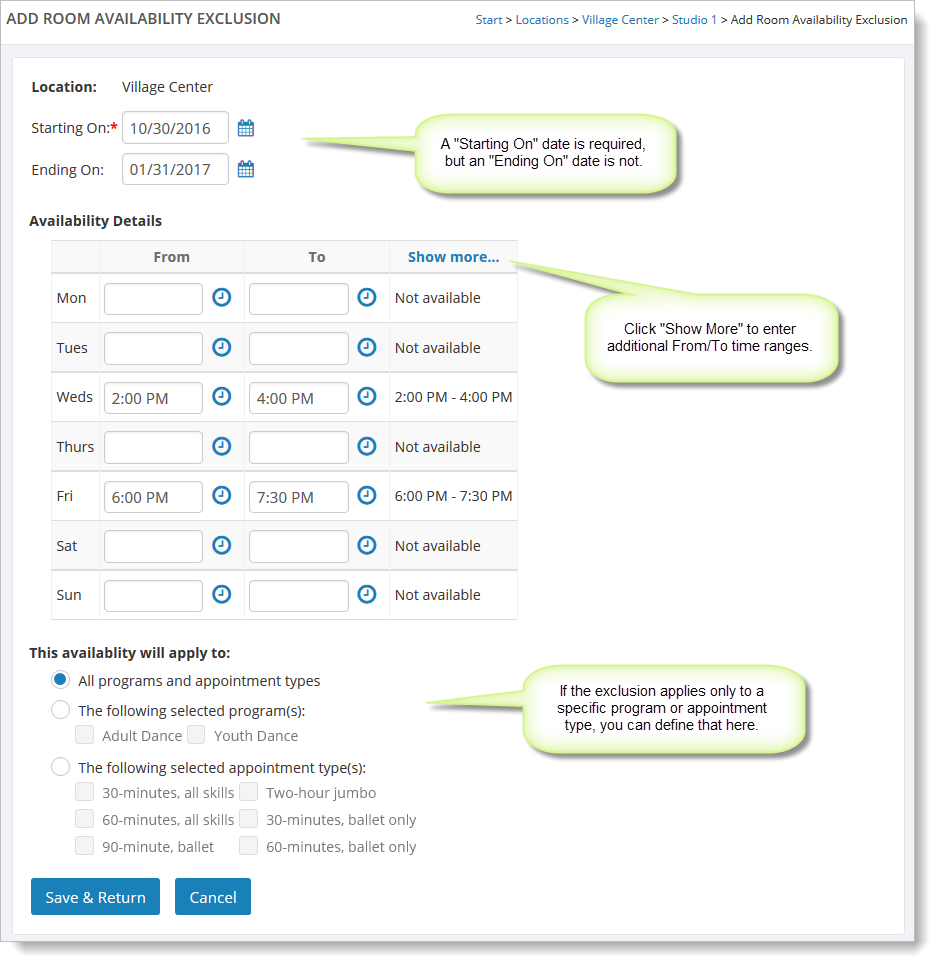
The "Starting On" date is required. If this exclusion doesn't apply
after a certain date, you can select that date in the "Ending On" field.
The "This availability will apply to" area of the page allows you to select specific programs or appointment types if the exclusion only applies to them.
If the exclusion applies to all programs and all appointment types, you can simply leave the first option selected and click on the "Save & Return" button.
Otherwise, you can use the options in the "This availability will apply to" area to select a specific
program or appointment type to which this exclusion applies.
When you are done on this page, select the "Save & Return" button.
Editing and deleting an availability schedule or exclusion
To edit or delete an existing availability or exclusion, go to Setup > General > Locations. Search for and open the relevant location. Click on the "Rooms" tab.
On the grid, hover over the room and click on the far right blue down arrow. Select the "Edit" command. You will see any existing availability schedules or exclusions for the room.
Hover over a row and click on the far right blue down arrow. Select the "Edit" (or "Delete" command).