How to set up teachers for appointments
In order to schedule appointments, you need to define each teacher's availability. To do this, go to Setup > General > Instructors. Search for and open the relevant instructor. Click on the "Availability" tab.
The first step is to select from the "Location" dropdown list the
location where the instructor teaches. (If the instructor teaches at
multiple locations, you must define his/her schedule for each location.)
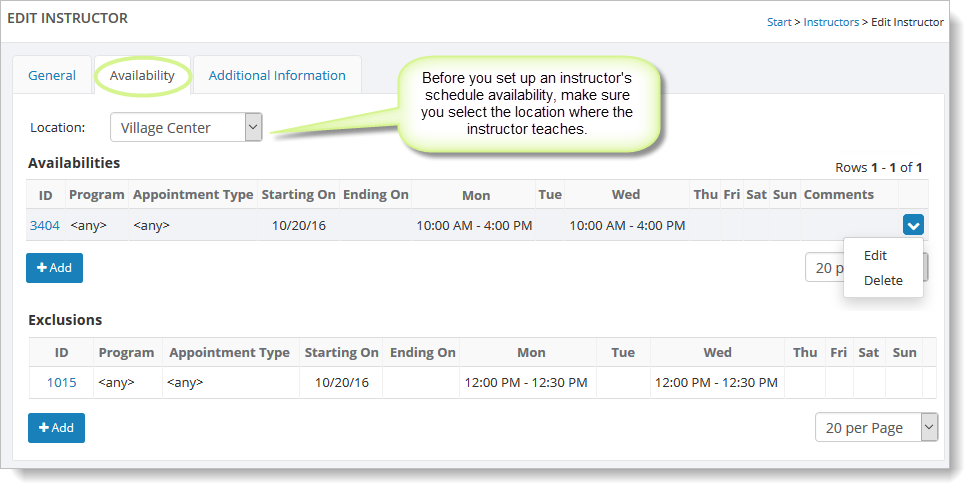
For information on editing or deleting an availability schedule or exclusion, see Editing and deleting an availability schedule or exclusion at the end of this page.
Adding availability
In the "Availabilities" section, select the "Add" button. You will see a blank form to fill out:
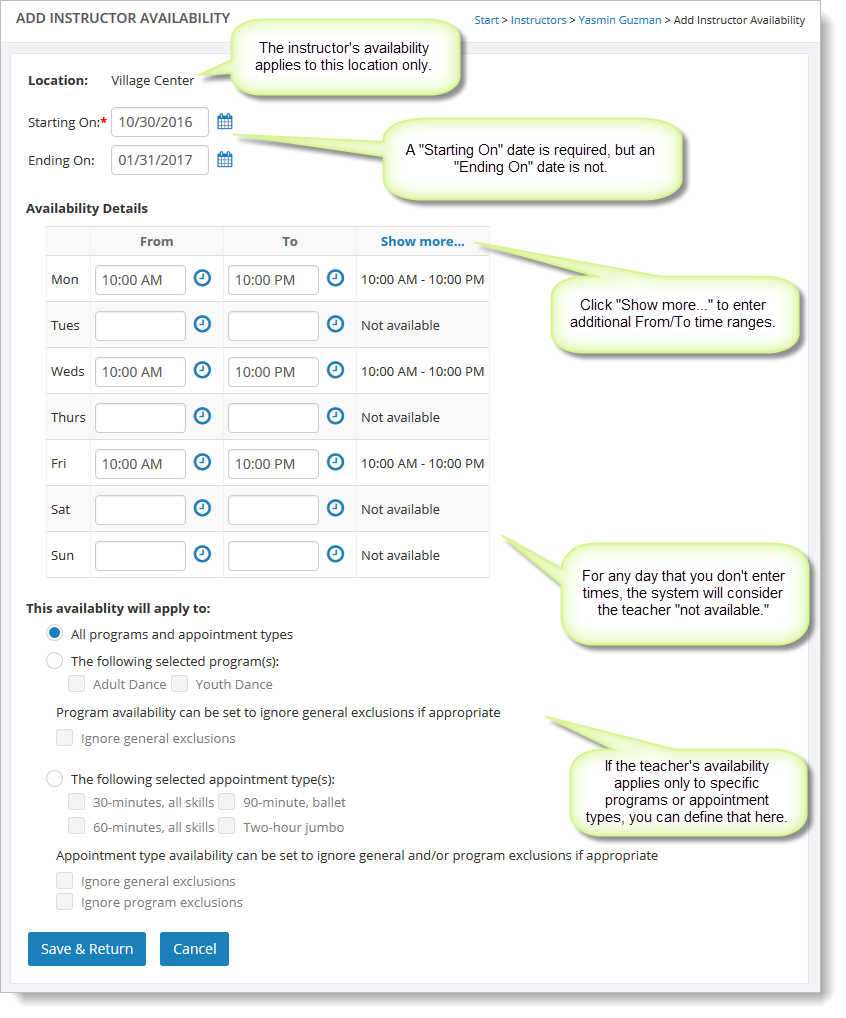
The "Starting On" date is required. If the teacher's availability will change after a certain date (for example, at the end of the year), you can select that date in the "Ending On" field.
Availability Details
In this area, you can define the days of the week and the time ranges when the teacher is available. In the example above, the teacher is available on Mondays, Wednesday and Fridays from 10:00 AM until 10:00 PM.
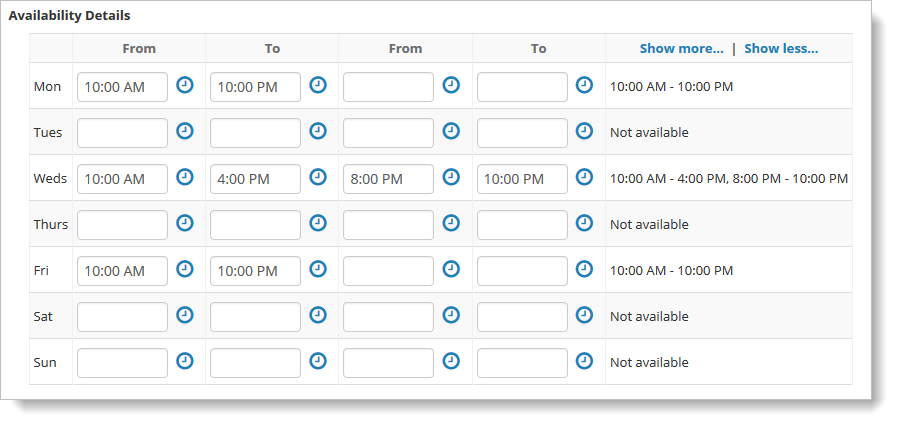
If you need additional time ranges for a day, click "Show More" in the upper right of the grid, and you will see more "From - To" time range columns.
See the image below for an example. The teacher's availability on Wednesdays has
changed. She is now available on Wednesday from 10:00 AM - 4:00
PM and from 8:00 PM - 10:00 PM.
Note that if you click "Show Less," the additional "From-To" time range columns are
deleted.
"This availability will apply to" section
If the instructor availability defined in "Availability Details" applies to all programs and all appointment types, you can simply leave the first option selected and click on the "Save & Return" button.
Associating the availability schedule with a program
However, if the availability defined in "Availability Details" applies only to certain programs or certain appointment types, you can define that information in this section.
If the instructor availability defined on this page applies only to a specific program, you can select that program with the second option. You can select more than one program if necessary.
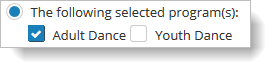
If you select one or more programs with the second option, you have the option to save this availability so that it ignores any general exclusion set up. (A general exclusion is one that applies to any program.) If you want this to be the case, select the checkbox directly below the program(s):
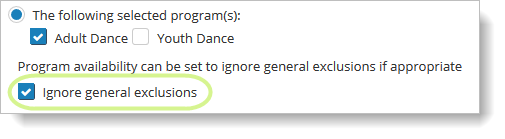
Information about exclusions is explained in the following section.
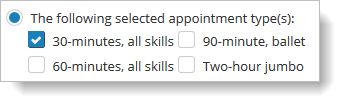
Associating the availability schedule with an appointment type
Instead of having this availability associated with a program, you can associate it with an appointment type (or types):
If you select the checkbox of one or more appointment types, you have the
option to save this availability so that it ignores any general
exclusion or program exclusions.
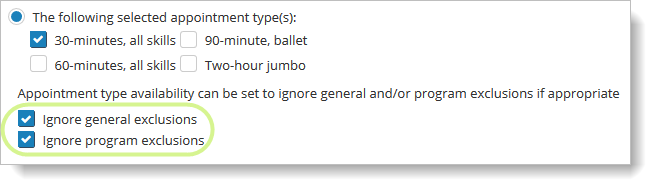
Information about exclusions is explained below.
Saving availability information
When you are done defining the availability for this teacher and location, click the "Save & Return" button. You will see your newly added availability displayed in the availability grid.
Note that if this availability applies to more than one program (or more than one appointment type), Main Street Sites creates an
availability row for each program (or appointment type). This means you may see more than one availability row in the grid.
Adding an exclusion
When you create an availability schedule for an instructor, you can also create exclusions. These exclusions can apply to the instructor's entire schedule (such as taking a lunch break every day for half an hour) or only to certain programs that the instructor teaches.
To set up an exclusion, go to Setup > General > Instructors. Search for and open the relevant instructor. Click on the "Availability" tab.
An instructor can have multiple availibilities defined for multiple locations, so first make sure that the correct location is selected at the top of the page:
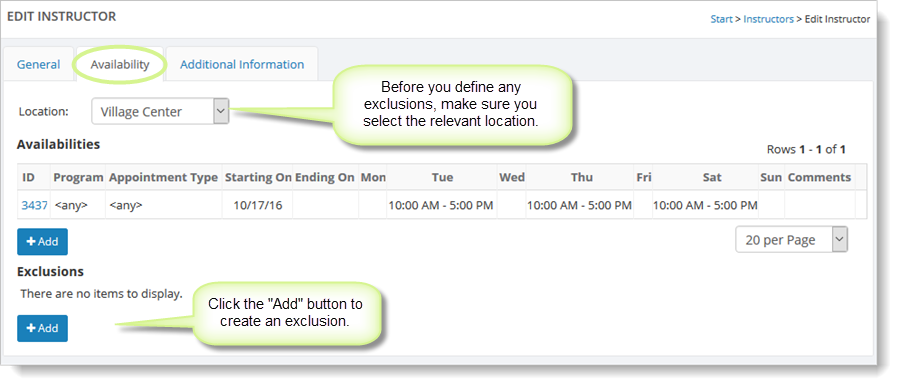
In the "Exclusions" section, select the "Add" button. You will see a blank form to fill out:
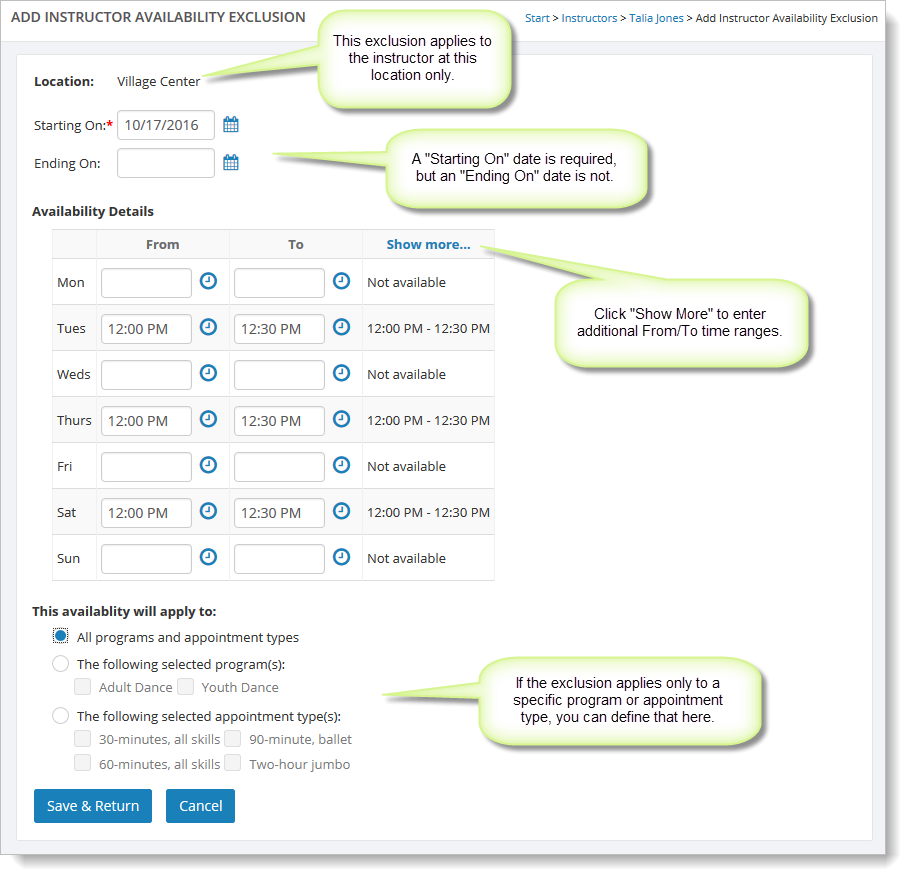
The "Starting On" date is required. If this exclusion doesn't apply after a certain date, you can select that date in the "Ending On" field.
Exclusion Details
In this area, you can define when the availability exclusion applies by entering a time range for the relevant days of the week. In the example above, the exclusion is for the lunchtime period on those days that the instructor is working – Mondays, Wednesday and Fridays. This means that you won't be able to schedule appointments for this teacher at this location during those time periods/days.
If you need to exclude additional time ranges, click "Show More" in the
upper right of the grid, and you will see more "From - To" time range
columns.
See the image below for an example of entering an additional "From - To" time range. The exclusion on Saturday now also includes the time from 4:00 PM - 5:00 PM.
Note that if you click "Show Less," the additional "From-To" time range columns are
deleted.

"This availability will apply to" section
This area of the page allows you to select specific programs or appointment types if the exclusion only applies to them.
If the exclusion applies to all programs and all appointment types, you can simply leave the first option selected and click on the "Save & Return" button.
Associating the availability schedule with a program
If the exclusion defined on this page applies only to a specific program, you can select that program with the second option. You can select more than one program if necessary.
Associating the availability schedule with an appointment type
Instead of having this availability associated with a program, you can associate it with an appointment type (or types):
Saving availability information
When you are done defining the exclusion for this teacher and location, click the "Save & Return" button. You will see your newly added exclusion displayed in the exclusion grid.
Note that if this exclusion applies to more than one program (or more than one appointment type), Main Street Sites creates an exclusion row for each program (or appointment type). This means you may see more than one exclusion row in the grid.
Editing and deleting an availability schedule or exclusion
To edit or delete an existing availability or exclusion, go to Setup > General > Instructors. Search for and open the relevant instructor. Click on the "Availability" tab. You will see any existing availability schedules and exclusions in their own grids.
Hover over a row and click on the far right blue down arrow. Select the "Edit" (or "Delete" command).