Categories
The purpose of categories is to allow you to group your classes arbitrarily based on something that we haven't built into the system. In this case, you could create a category called "Sessions" and define the values 2,3,4,5, etc.
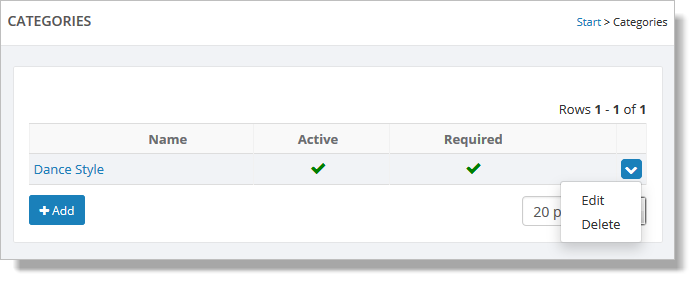
You can create and manage categories by going to Setup > Advanced > Categories.

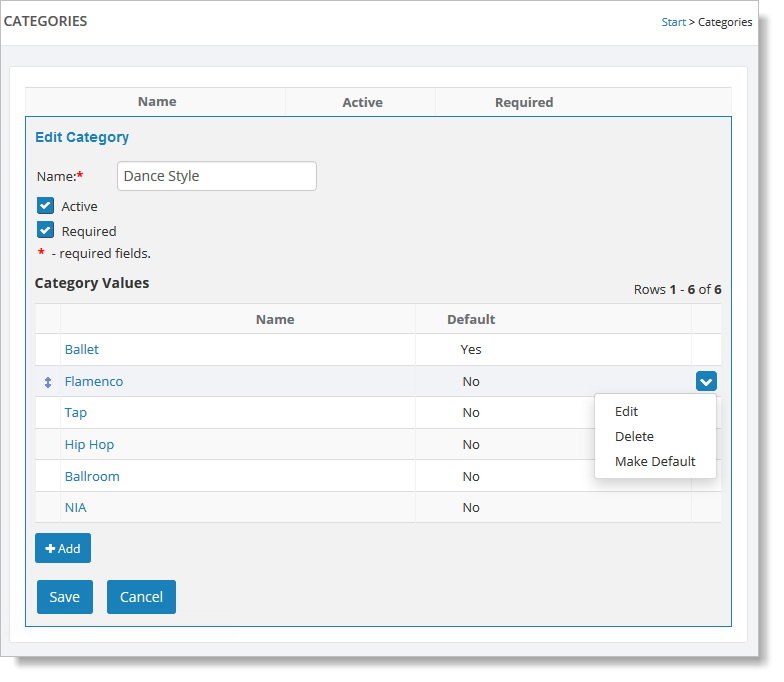
To edit or delete a category, hover over it and click the blue down arrow on the far right. This action displays a drop-down list with both the "Edit" and "Delete" commands. You can also edit a category by clicking the category name. This action takes you to Edit Category.

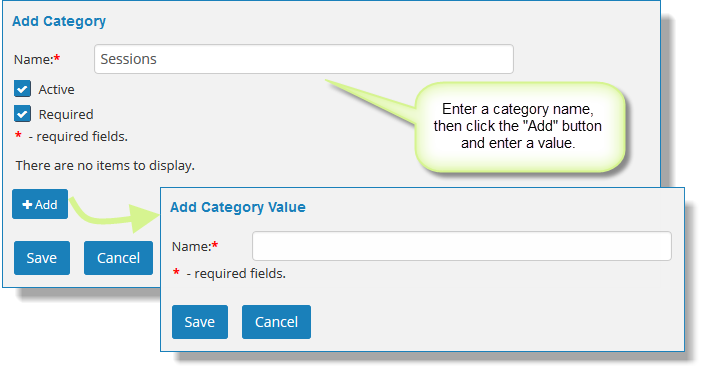
Click the "Add" button to add a new category. Enter a name and the values for that category. You also need to pick one of the values as the default
value. When a default exists, each class will always have a
value assigned for that category. This allows you do do more with the category
(like use it in a named layout).

After you have created and saved the category values, click the "Save" button to add the category to the Categories grid.
The category
can now be used in the system.
Assigning a category to a class
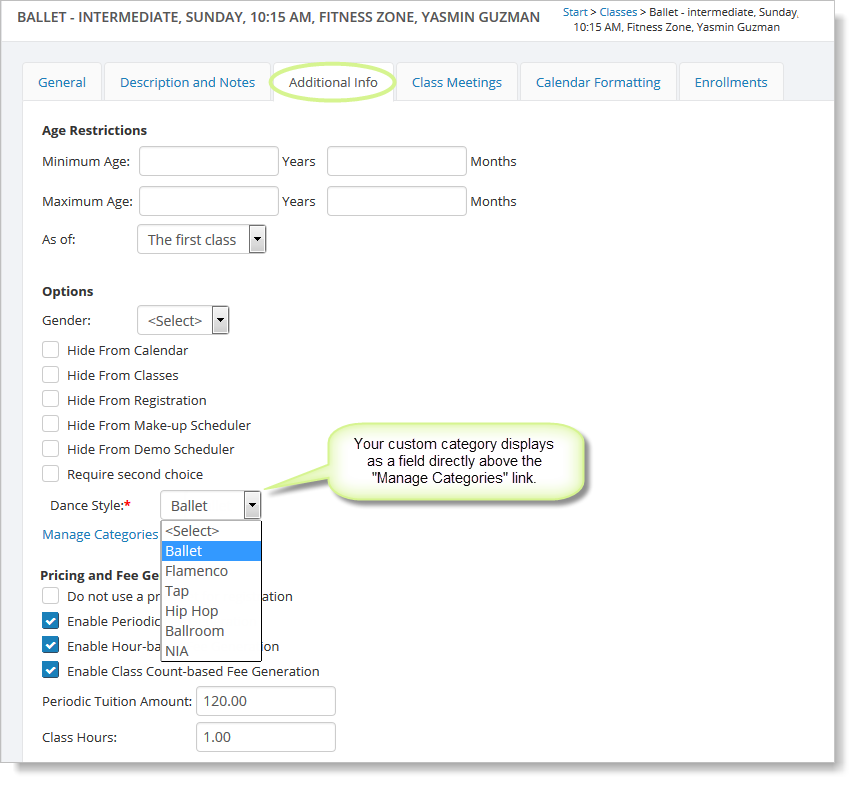
Go to Manage > Classes > Classes, select a class to edit, and then select the Additional Info tab. Scroll down to the "Manage Categories" link, and your custom category is displayed as a field with a dropdown list. Note how the default value was automatically assigned to the class. You can change the value for this specific class in the field, if necessary.

In Website > Settings > Named Layouts, you can use the category as a column for your registration and class page layouts.