How to use Named Layouts for the Demo Scheduler
Main Street Sites creates a default layout for your demo scheduler. It looks something like the example below. With the Named Layouts feature you can configure the demo scheduler layout to best suit the needs of your business. You can add columns, change the column order, change the column header labels, remove columns, change grouping and sorting, add filters, etc.
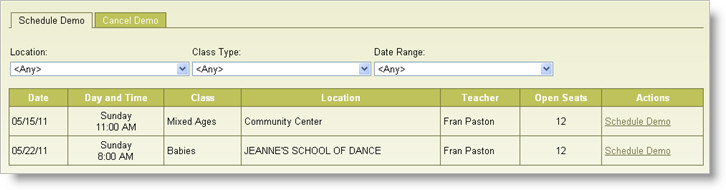
Here is an example of a demo scheduler layout:
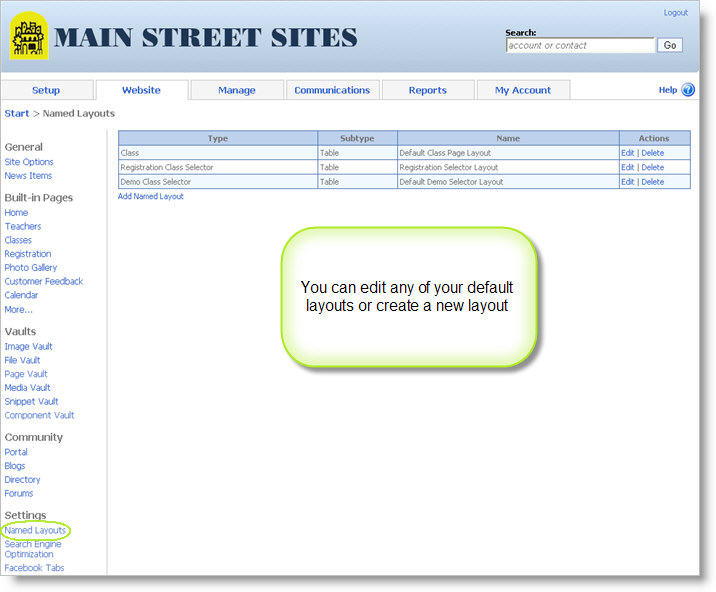
To update the default named layout used by the demo scheduler, go to Website > Named Layouts.
You will see that a default set of layouts has been created for you automatically. You should see layouts for the classes page, registration page and demo scheduler, as shown here.
Click the edit link for the layout you wish to change. Or click on Add Named Layout to create a new layout.
The layout form looks like this. You can add a filter if you don't want all of your classes to show at once time. And you can change the grouping and sorting of your classes.
In the grid section you can update the columns used to show your classes.
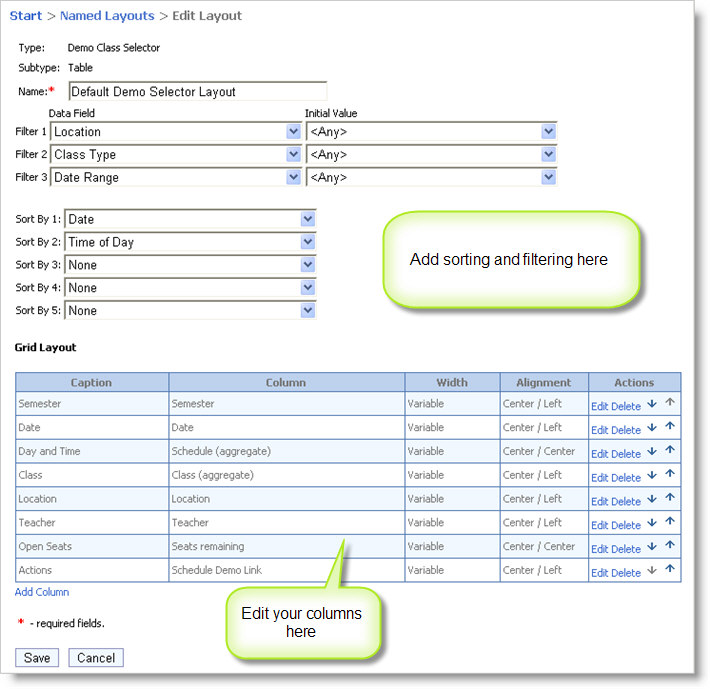
When you add or edit a column, you can specify the caption for the column header, the data source for the column, and the width and alignment of the column.

Column widths can be variable (i.e. let the browser decide how best to show the column) or fixed. Fixed columns widths are expressed as a percentage of the screen width or as a fixed number of pixels. You may find you need to experiment when working with column widths.