Preregistration Settings
Preregistration allows you to limit registration of certain classes to only those customers to whom you have given permission. Most of the time this is used to give returning customers the ability to register for the next semester before anyone else.
Here is an example of a class in preregistration status:
To use this feature, you'll need to pick dates for your preregistration period and select a secret code. You'll also need to indicate which classes should be affected.
Setting up preregistration
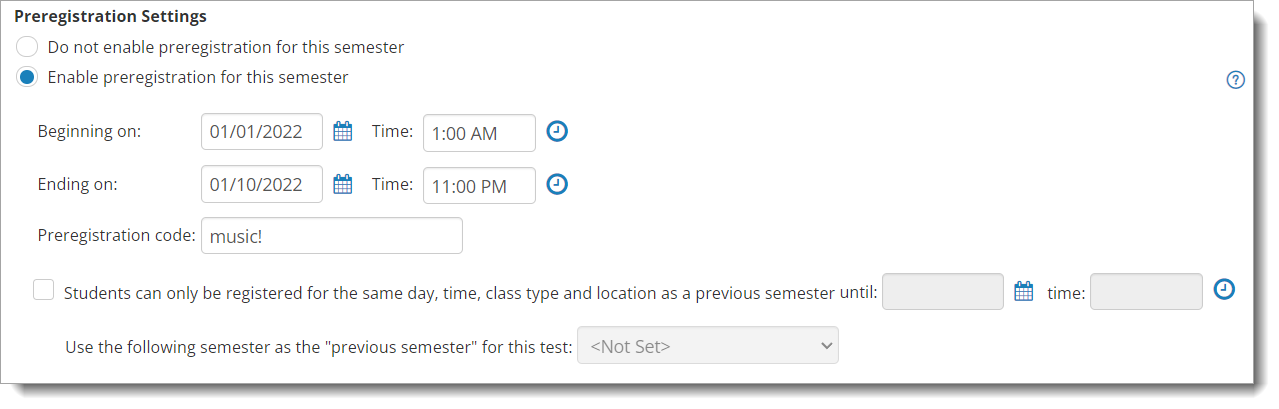
To set up Preregistration for a semester, you need to be editing the relevant semester at Setup > General > Semesters. Next, select "Enable registration ..." to show the preregistration options. Then fill in the dates and the secret code as shown below.
Update class statuses
Preregistration will only apply to classes in the "preregistration" status, so you'll need to update the class statuses for any classes that should be protected by the secret code. You can update statuses manually in the list, or by picking a status at the bottom of the page and clicking on the Go button.
Preregistration on your website
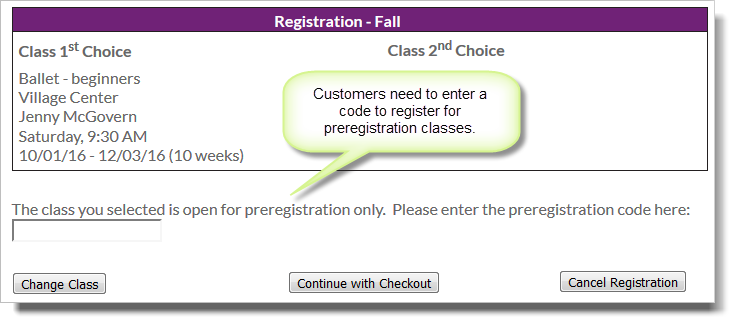
When preregistration is enabled, classes show as "Preregistration Only" on the classes page:

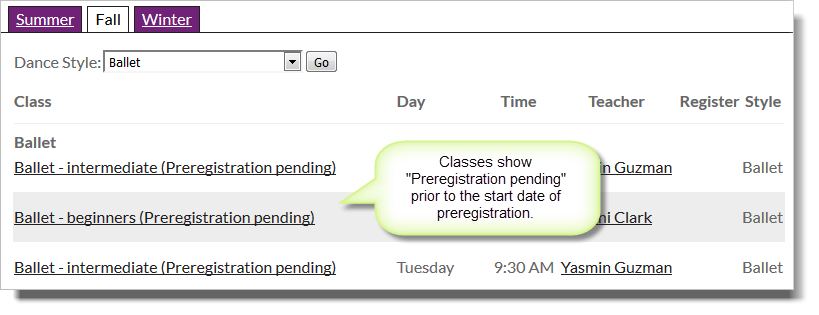
If the preregistration period hasn't started yet, the classes will show as "Preregistration pending" instead.
Additional notes:
- Classes in the preregistration status will not be available for registration prior to the start of the preregistration period.
- Once the preregistration period is over, classes in the preregistration status are treated the same as those with an "open" status.