How to control access to the Customer Portal
The Customer Portal supports a rich security model that can be configured several different ways. You can have a very simple model or a layered model, depending on your preferences.
Here are two examples of portal security models, a simple one and a slightly more complicated one:
A simple security model
- Visitors to your website can create accounts.
- Anyone who creates an account can access everything in the Customer Portal.
- You can revoke the ability to access your portal from any account (but they could always create another account to get back in).
A security model with three layers
- Visitors to your website can create accounts.
- Anyone who creates an account can only access a "Welcome" section of the portal, plus the "Account Information" section (to update name, address, etc.). This is the first layer (level 1).
- You can update any account to give them access to other aspects of your portal, such as your class materials or a class directory. This is the second layer (level 2).
- Your teachers have accounts and can access the "Teachers Only" section of the portal. This is the third layer (level 3).
Generally speaking, we would recommend that you have at least two layers of security for accessing your portal. The first level is what anyone gets when they create a new account. The second level is only available to people to whom you choose to grant a higher level of access.
A security model has levels
Security for your Customer Portal is based on five possible levels (plus "None," indicating no access to the portal):
None (no access at all)
Level 1 (limited access)
Level 2
Level 3
Level 4
Level 5 (full access)
A Portal Access Level is assigned to the items in your portal
and to each contact. As long as the people accessing the portal have the right level for the items they are trying to access, they can see the information. Otherwise, they'll get a message saying, "We're sorry. You don't have permission to access this section of the portal."
How to set up your security model
Setting up your security model is just a matter of deciding who gets to see what.
Start by deciding the default level of access that new accounts should have. Most likely that should be "Level 1 (limited access)." This setting can be found at Setup > Settings > Account Settings, shown here:
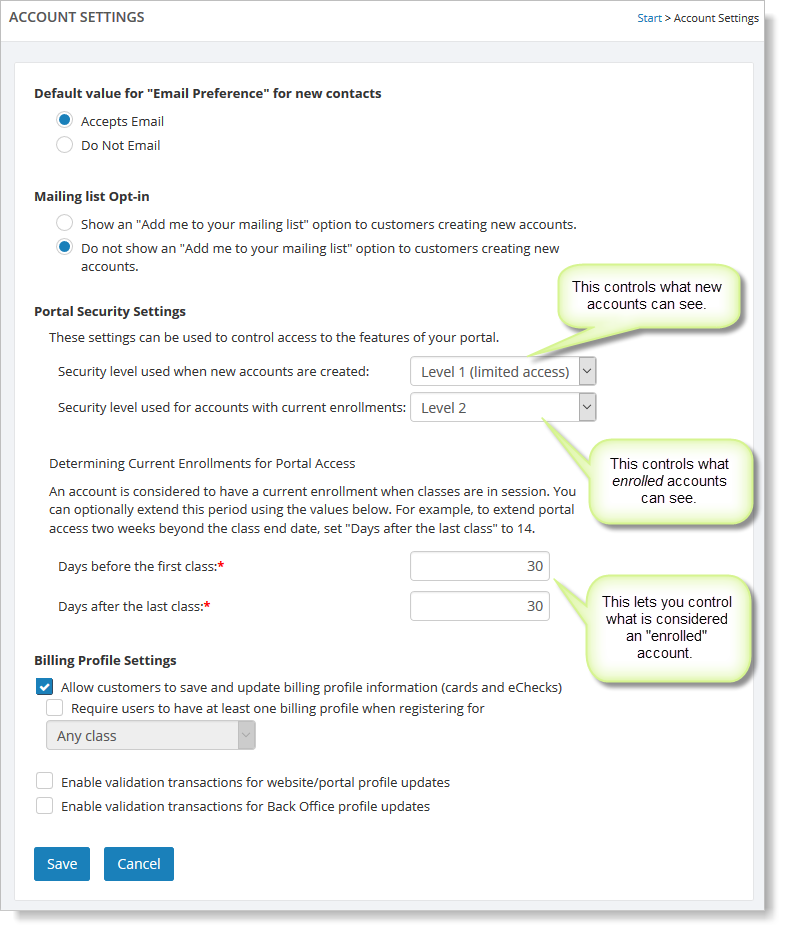
In this example, all new accounts will have Level 1 access, so you will want to go to your portal setup at Website > Community > Portal, and on the Layout tab decide which items should be set to Level 1 and which items should have a higher level.
Anything that is OK for new accounts to see should be set to "Level 1 (limited access)." At minimum, this should include the "Logoff" page, and the "My Account" page. You might want set other pages to Level 1 as well (if you have the Demo Scheduler in your portal, for example, you would probably want to make it available to your new accounts).
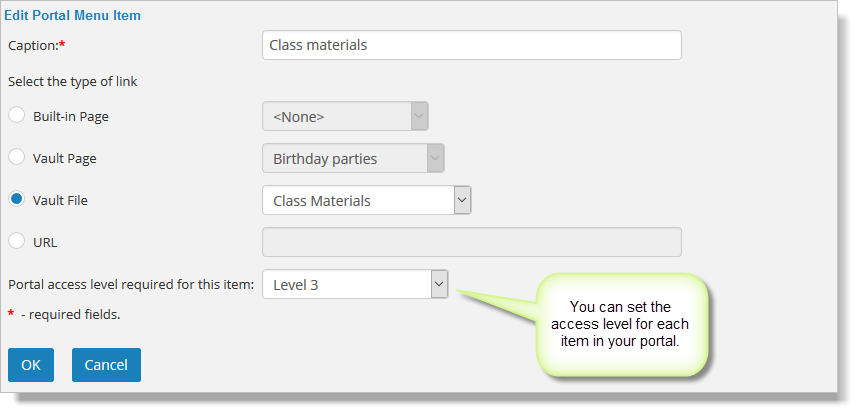
The image below shows how you would set the Portal Access Level for an item in your portal. See How to add items to the portal for a more detailed discussion of that process. In this case, we are setting the access level to "Level 3" for the "Class Materials" portal item.
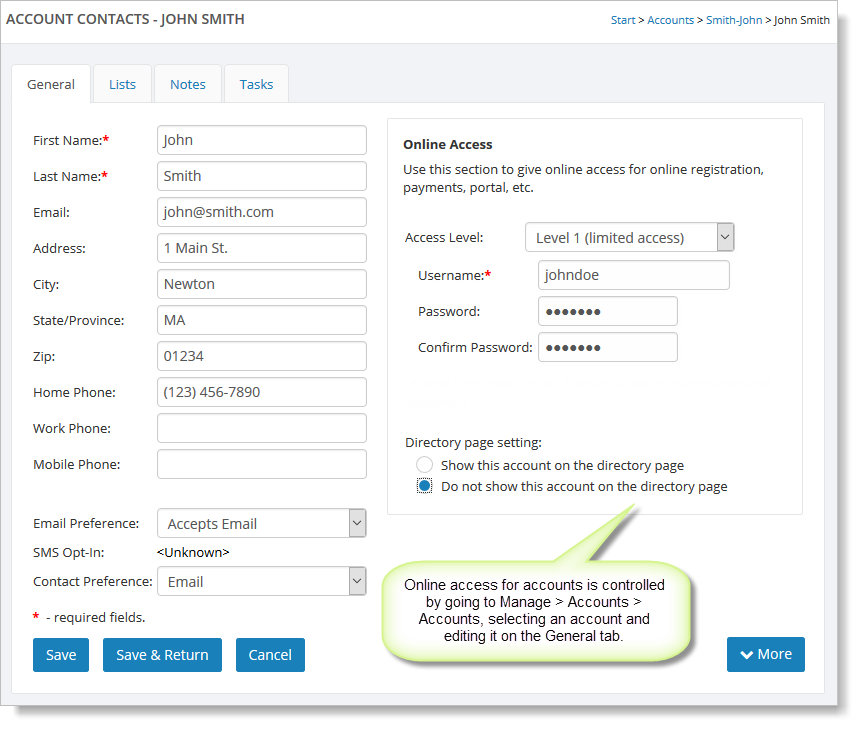
Note that so far we've said that new accounts will be assigned "Level 1 (limited access)," and we've set the "Class Materials" portal item to require a Portal Access Level of "Level 3." To allow a specific account contact to access this item, we'd need to update the Portal Access Level for that contact. To do this, go to Manage > Accounts > Accounts and locate the specific account you want to edit. Select the account to open up the account information for editing. The access level is set in the "Online Access" section on the General tab.
See How to edit accounts for more information about maintaining your customer accounts.
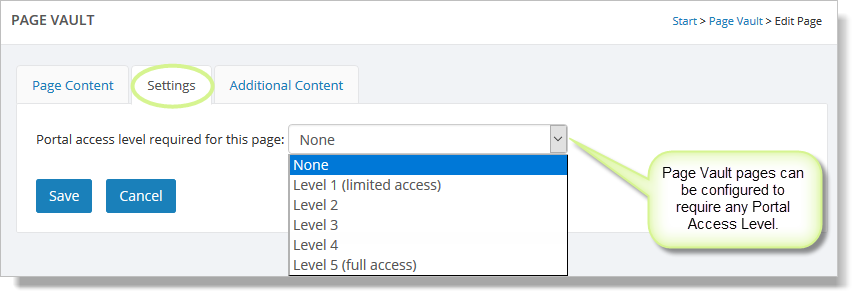
How to secure Page Vault pages
For additional security, you may wish to set a Portal Access Level for any Page Vault page that is part of your portal. If you apply an access level to a Page Vault page, Main Street Sites will always make sure the person accessing the page has the right level of security, no matter how he/she accesses it. Please see How to add new pages to your site for more information on how to use your Page Vault.
Don't forget to test your security model
If the contents of your Customer Portal truly need to be kept private, then it will be important that you test your security configuration to make sure the portal behaves as you expect it to.
Please ask us for help if you need it.