Adding, editing and deleting demos (from Manage > Classes > Classes)
This article will discuss how to add, edit and delete demos from Manage > Classes > Classes.
Demos can be entered, edited and deleted from several different places in Main Street Sites. For a full discussion of the options in this area, please see Adding, editing and deleting demos (general).
To add a demo, go to Manage > Classes > Classes. Locate the relevant class. Hover
over it, click the blue down arrow on the far right, and select the
"Edit" command. You can also click on its name.
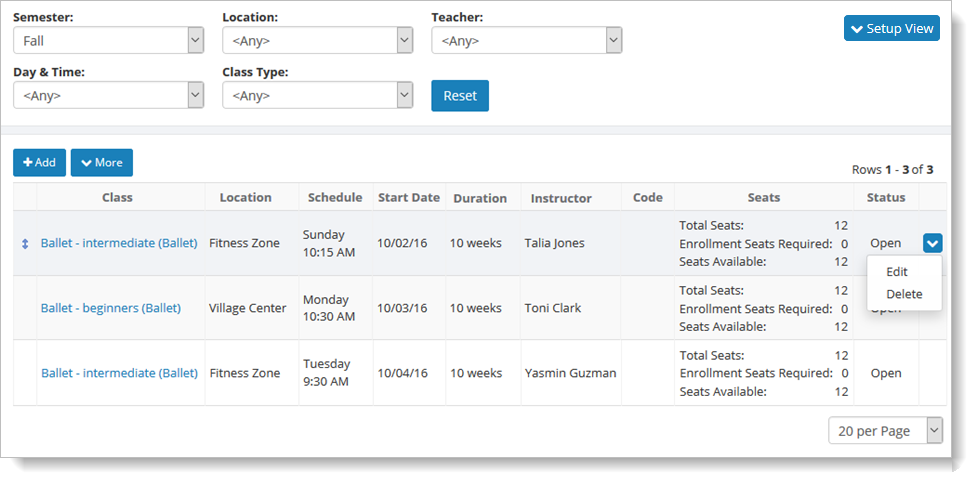
Demos are always associated with a particular class meeting, so
you'll need to click the Class Meetings tab to find the right class
meeting. Once you have found the right class meeting, hover
over it, and click the blue down arrow on the far right. Select
"Demos" from the dropdown list.

You will see any demos already scheduled for that class meeting, as well as the "Add" button for adding new demos for the meeting.
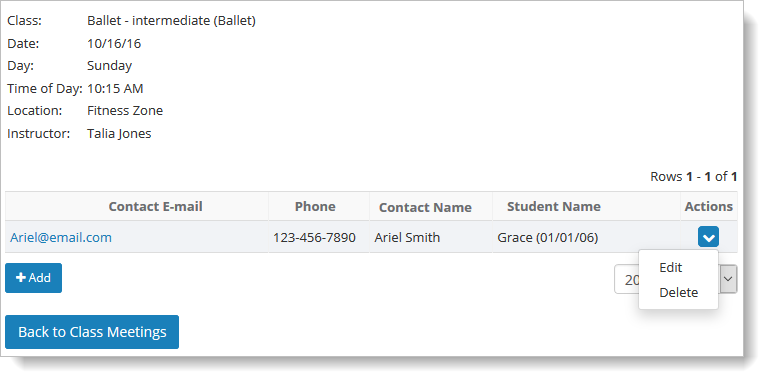
To add a new demo, click on the "Add" button and follow the steps described in Entering a demo. A notification about the demo will be sent to your customer, yourself and to the teacher of the class.
You can also edit and delete existing demos from here by clicking on
either the "Edit" command or the "Delete" command from the dropdown
list. A "Demo has been cancelled" notification will be automatically sent to your customer and the teacher of the class when the demo is deleted.