Adding, editing and deleting payment profiles
Please review the information in the Payment profiles overview if you would like to begin using payment profiles in your Main Street Sites account. There are some required services you may need to add to your account.
Enabling payment profiles
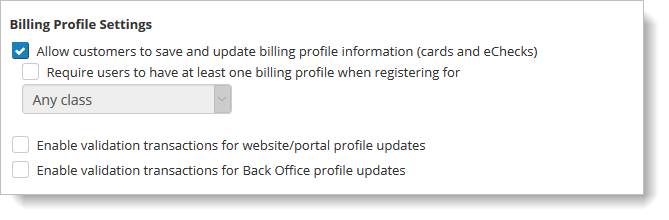
Before you can begin working with payment profiles you'll need to enable the feature for your account. Go to Setup > Settings > Account Settings and enable the "Allow customers to save and update billing profile information" setting, shown here:
Note that eCheck profiles can only be created through Back Office (back-end) if eCheck processing has been enabled for your account. Echecks have specific written authorization requirements and, therefore, cannot be saved directly by your customers.
You may wish to enable the last two settings in the "Billing Profile Settings" section regarding validation transactions.
Turn on these settings if you would like each payment profile to be validated when it is entered or updated (either on your website or in your Main Street Sites account). The advantage to this is you will know in advance if a set of credit card information is valid. However, there is typically a small charge for each validation transaction (usually about ten cents), so there is some cost associated with these options.
Editing payment profiles
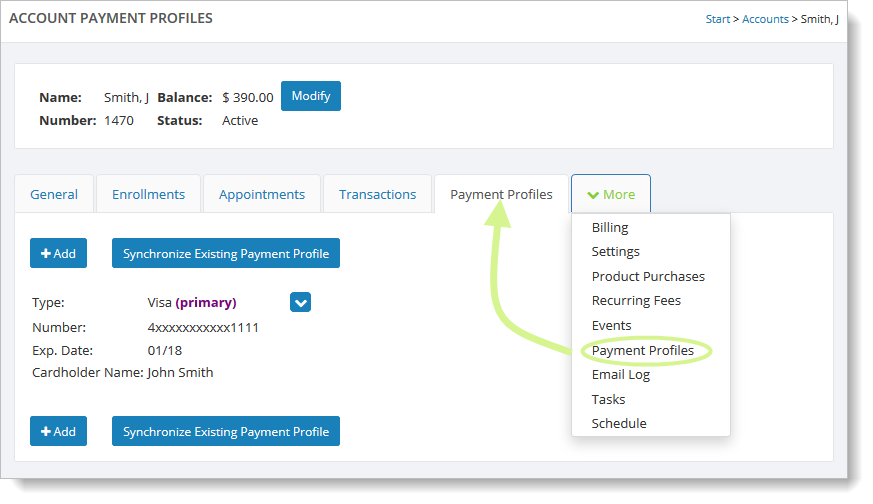
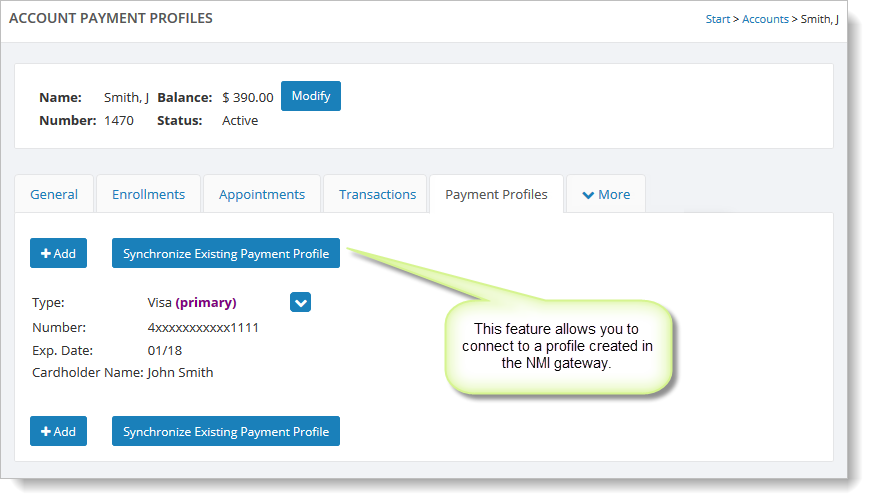
Go to Manage > Accounts > Accounts, and locate and open a customer account. Select the "More" tab and click on "Payment Profiles."
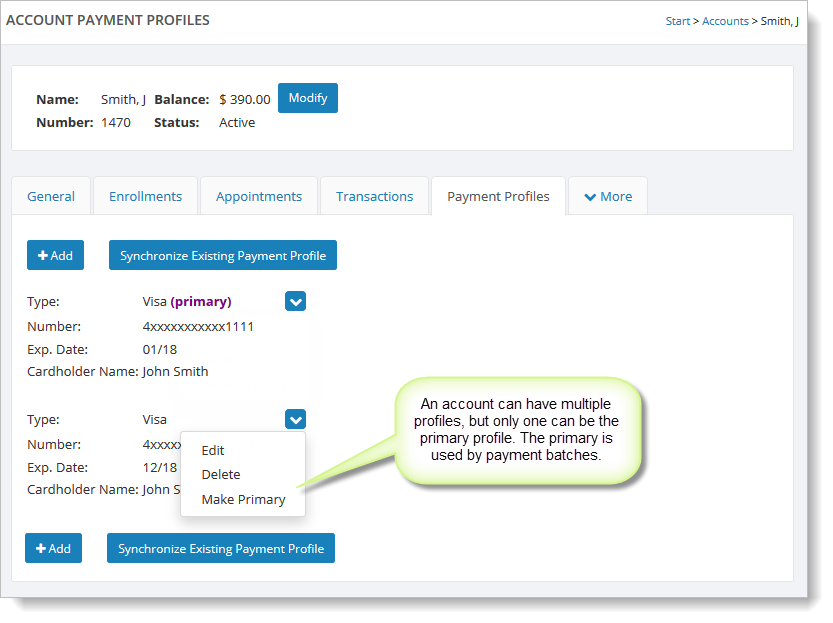
To edit a profile, click on the blue down arrow next to the relevant profile and select "Edit." If this is the credit card profile that should be used for payment batches, you should select "Make Primary."
Adding payment profiles
Click on the "Add" button to add a new profile.
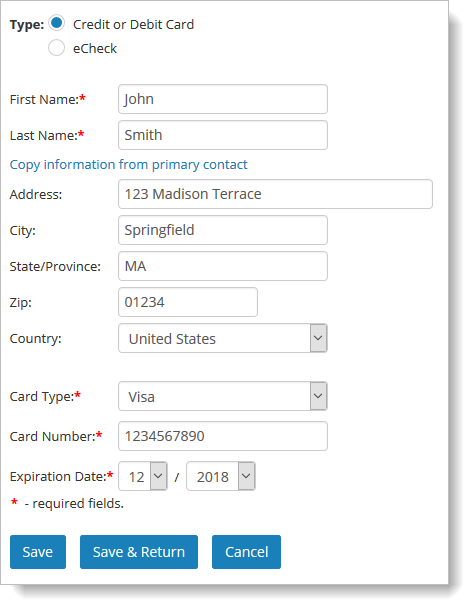
If you are adding a new credit card, the form will look like this:
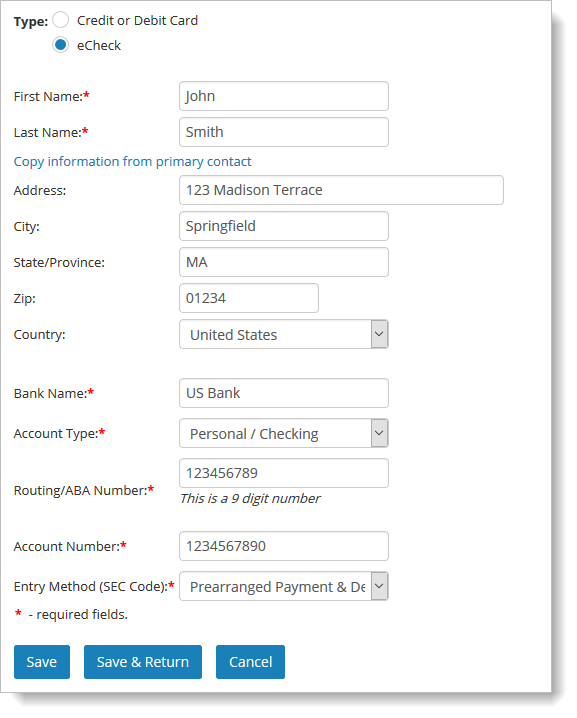
If you are adding a new eCheck profile, it will look like this:
Deleting payment profiles
To delete a profile, click on the blue down arrow next to the relevant profile and select "Delete."
Creating a profile when you don't have the customer's credit card number
In some cases, the customer has not created a payment profile, but does intend you to "use their card on file" to process payments for them. It is possible to create a payment profile in this case, as long as either you or the customer have previously run an online payment using the credit card information. The profile can be created from the information on that earlier transaction.
Important note: It is essential that you only use this feature when you have your customer's consent to use their stored credit card information to process additional payments. It is your responsibility to obtain adequate consent from your customers to bill them using Main Street Sites.
To create a payment profile from an existing charge in the NMI payment gateway, first go to the "Payment Profiles" tab in the customer's account. Select the "Synchronize Existing Payment Profile" button.
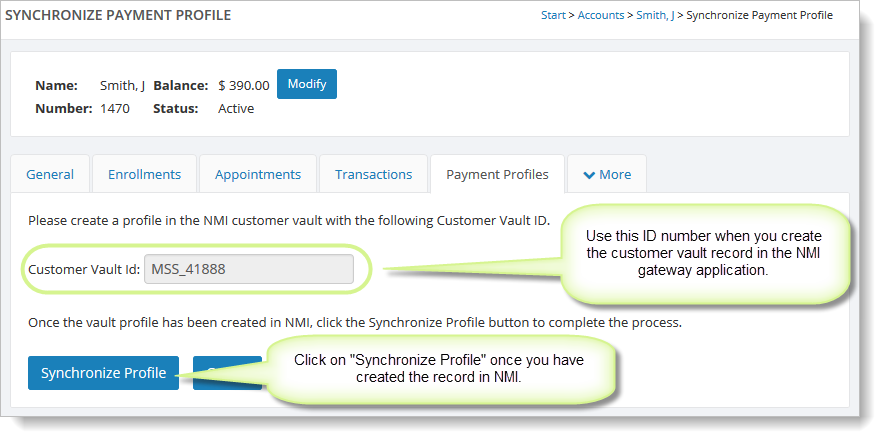
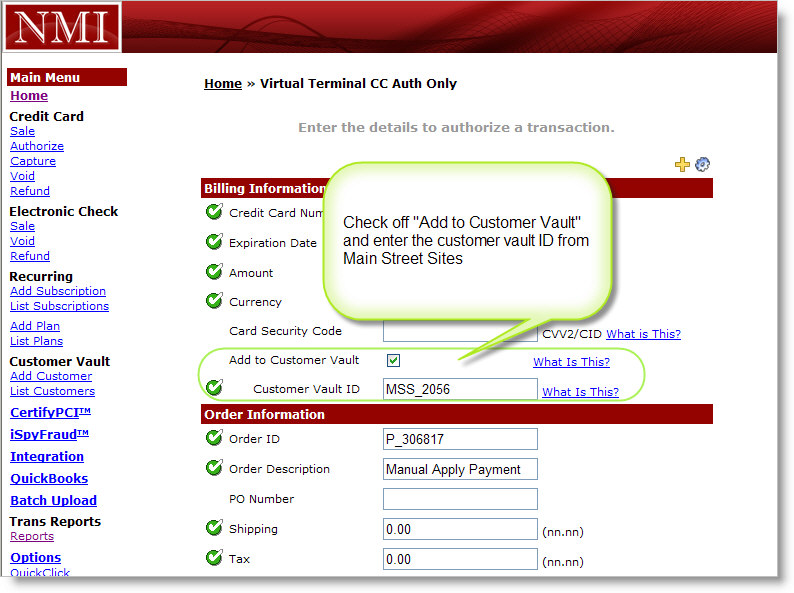
You'll see a page like this. The important information here is the "Customer Vault Id". In this case it is "MSS_2056". You will need that ID number when you create the customer vault record in NMI. After you have created the customer vault record in NMI you will click on the "Synchronize Profile" button.
In NMI, go to Reports and locate a transaction from the customer for whom you wish to create a payment profile. View the transaction details, and click on the "Auth" link as shown here.
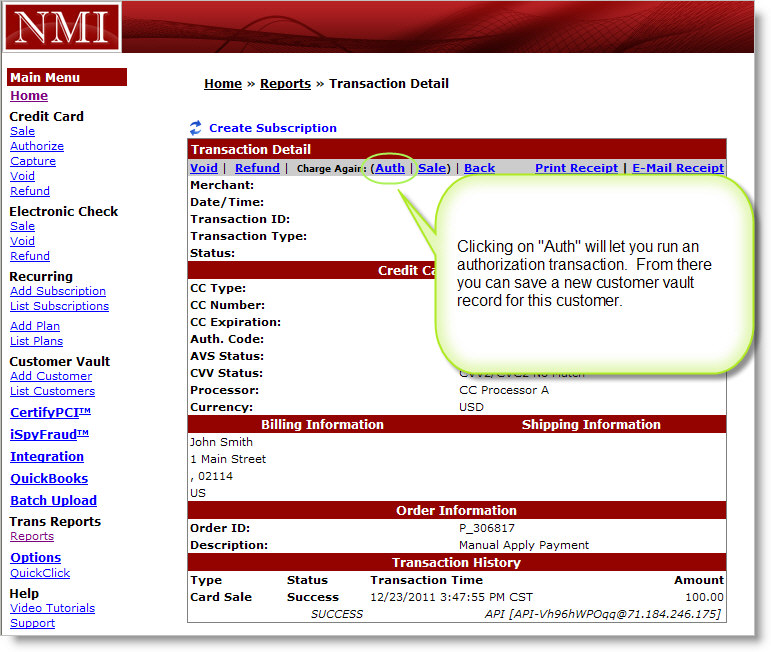
This will allow you to run an authorization transaction for this credit card. On the authorization form, select "Add to Customer Vault," and fill in the customer vault ID from the payment profile page, as shown here. Click on the "Authorize" button at the bottom of the page.
Now you can return to Main Street Sites and click on the "Sychronize Profile" button. As long as the two ID values match correctly, this will create a new payment profile that is connected to the NMI customer vault record. The payment profile can now be used in Main Street Sites as normal.