Adding, editing and deleting refunds (from Manage > Financials > Fees & Credits)
This article will discuss ways to add, edit and delete refunds from Manage > Financials > Fees & Credits.
Refunds can be entered, edited and deleted from several different places in Main Street Sites. For a full discussion of the options in this area, please see Adding, editing and deleting refunds (general).
To add a refund from Manage > Financials > Fees & Credits, you will first need to click on the "View" command for a credit as shown here:

Once you are viewing a credit, click on the Payments & Refunds tab. Select the "Add" button, then click on the "Apply Refund" command:
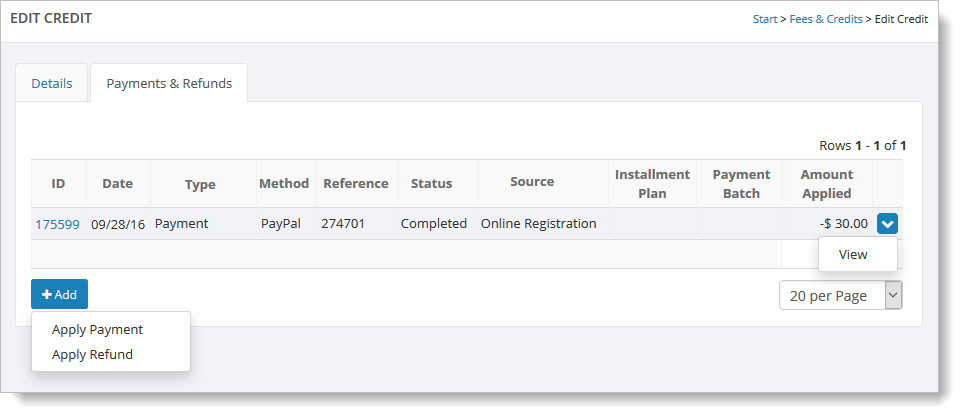
Then follow the steps described in Entering a refund. You can also edit existing refunds from here by clicking on the "View" button shown above.
To delete a payment, you must first click on the "View" button for the refund and then follow the steps described in Adding, editing and deleting refunds (general).