How to set global settings for your website pages
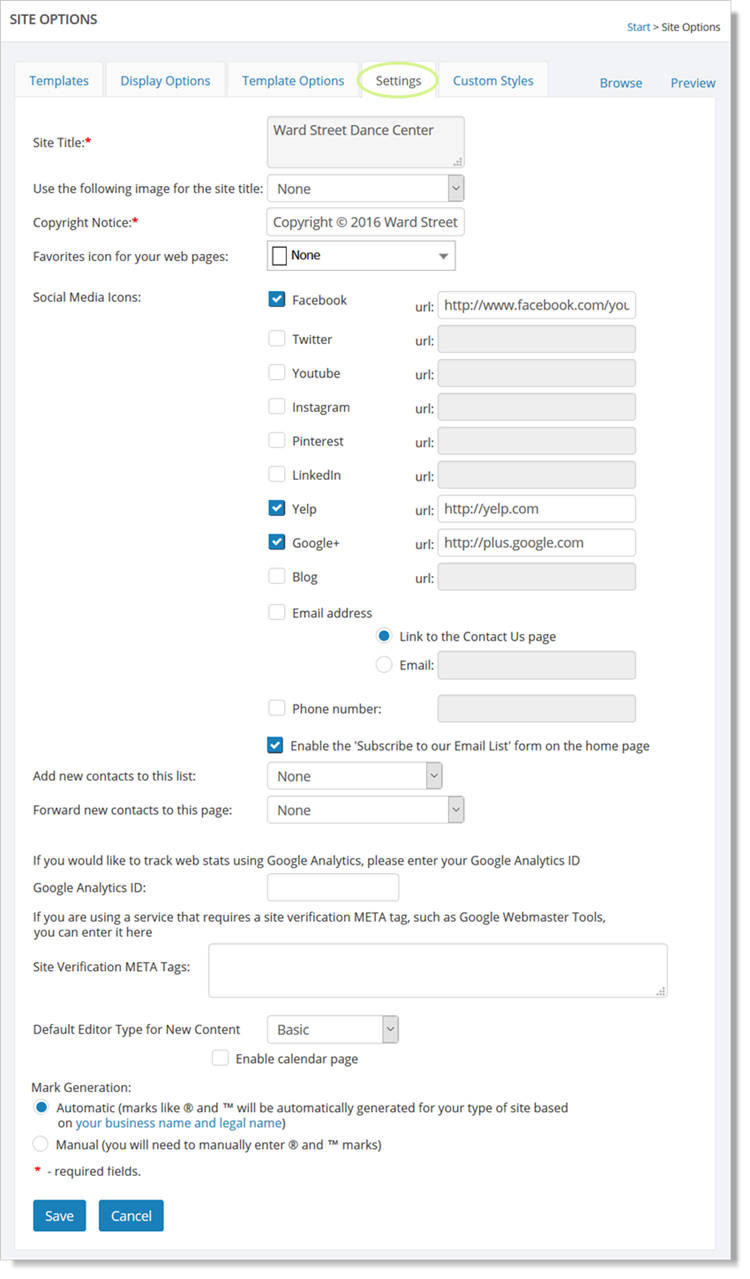
Global settings for your website pages can be found by going to Website > General > Site Options > Settings tab. Note that these settings are used whether or not you have a website account with Main Street Sites. If you are just using the Back Office service, these settings will apply to any web pages you might use with your account (like the registration pages, the store pages, etc.).

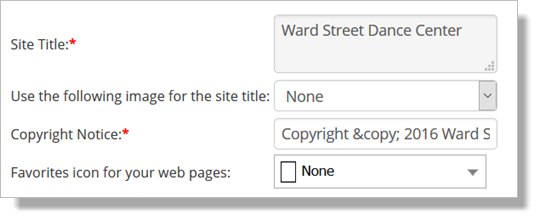
Use the "Site Title" setting to set the default title for all of your web pages. This will typically show at the very top of each page. If you'd prefer to use an image for your site title, you can select an image in the "Use the following image for the site title" setting.
Note: You need to upload your site title or logo image into your Image Vault before you'll be able to select it here. For more information, see Working with images.
Use the "Copyright Notice" setting to add text that will show at the bottom of each page. To add in the © symbol, type "©" (without the quotation marks). If you'd like, you can use the special "%year%" token to have the year generated dynamically for you. For example: "Copyright © 2001 - %year% Ward Street Dance Center, Inc."
The "Favorites icon..." setting lets you select an image to use as the "favorites" icon for your Main Street Sites webpages. You can use one of the preset images or you can upload a ".ICO" file to your image vault. Once you have uploaded the ".ICO" file, you can select it here in the "Favorites icon..." field.

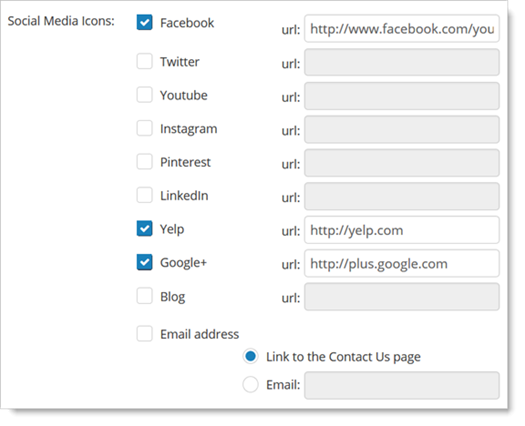
The "Social Media" feature lets you enter links to popular social media sites. For each link you enter, a corresponding icon will appear on your website. To enable your customers to contact you via email or a "Contact Us" form, check the "Email Address" box and select the relevant option under it.

The "Enable the 'Subscribe to our Email List' form..." setting will add a
subscription form to your home page. This option only applies if you are
using a Main Street Sites website.

If you are using Google Analytics, you can add you Google Analytics ID in the setting shown here. See How to enable Google Analytics for details on this.
Some other service (like Google Webmaster Tools) require
you to verify your ownership and control of your website. Use
the "Site Verification META tag" field to paste in verification
information from these services. It will be added to your website pages.
Note that you may need to select the "META tag" verification method if multiple verification methods are available.

The "Default Editor Type for New Content" setting lets you pick the
editor you'd like to use with your content. Set this to "Classic" if
you'd prefer to use a plain text editor. Set it to "Advanced" if you'd
like to have the greatest number of options available when you edit your
content. The "Basic" setting will give you a rich text editor with a
smaller set of options.
The "Enable calendar page" option can be used to add the calendar page to your website menu.
Note:
if you are using a custom menu you'll need to add the calendar menu to
your menu by going to the Website > General > Site Options > Custom Menu
tab.
If your business is associated with a licensing organization, your
website may provide custom handling for your licensing requirements. Use
the "Mark Generation" setting to activate this behavior for your
account. Generally this means that marks like "®" and "™" will be applied for you automatically as required by the licensing parent company.
