Getting started with payment batches
Payment batches allow you to run credit card and eCheck payments for many of your customers at once.
To use payment batches, you'll need the following:
1) A merchant account with the "Customer Vault" option.
The customer vault allows you to store customer credit card and eCheck information safely and securely. Separate fees may apply if you wish to use eChecks.
At the moment, payment batches only work with the Network Merchants gateway. Please contact customer support for more information about using this gateway.
2) A stored payment profile for each customer you wish to charge.
To run automatic payments as part of a payment batch, you'll need to have a valid payment profile for each customer you wish to charge. The payment profile will be used when the payment batch is run.
Customers can enter their own payment information on your website, either during registration (clicking on "Save this card for future use" when checking out) or in the "My Account" pages. You can enter payment profiles directly by going to Manage > Accounts > Accounts. See the Payment Profiles Overview for more details.
3) Unpaid fees that have been marked as "auto-collect."
Payment batches will only include fees that are marked as "auto-collect." This tells the system that you intend for these fees to be included in payment batches.
Fees set to auto-collect are most commonly created using recurring fees or installment plans. See Recurring Fees Overview and Installment Plans Overview for more details on these options.
You can set any fee to "auto-collect" when you create it or edit it on the Add/Edit Fee page. If you want this option to always be turned on so that the "Auto-Collect" checkbox is always selected for new fees, you can set this by going to Setup > General > Settings and making changes to the "Fee & Credit Auto-Collect Behavior" settings.
You can see all of your unpaid auto-collect fees by going to Manage > Financials > Fees & Credits and setting the filters as shown below:

Creating a new payment batch
To create a new payment batch, go to Manage > Billing > Payment Batches. You'll see a message indicating that there are no active payment batches:
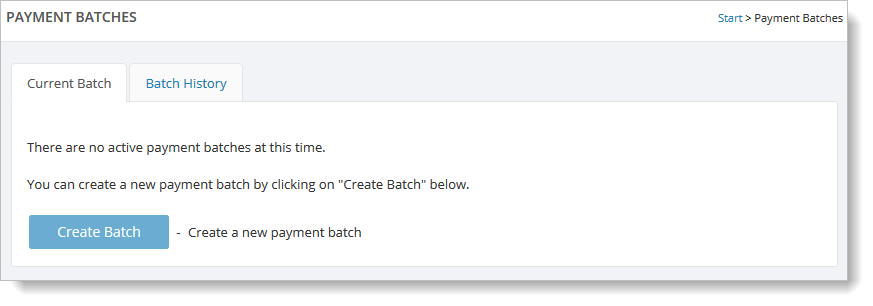
Click on "Create Batch" to create a new batch.
Note: You'll be able to delete the batch if you decide not to run it immediately.
Selecting Options for the Payment Batch
When you create a new payment batch, you can select various processing options. These options will tell the system:
- If it should run the payment batch for a specific billing cycle and/or membership level.
- How to handle any special cases it might encounter when running the batch. In particular, the two questions tell us what should happen if anything changes between now and when the payment is actually run. If the unpaid amount for one of your customers goes up or down, should we still run a payment for the planned amount? This is especially important because, although the payment batch stores the planned amount for each payment it will run, that amount can change if, for example, you post any payments manually before running the batch.
This is what the settings look like:
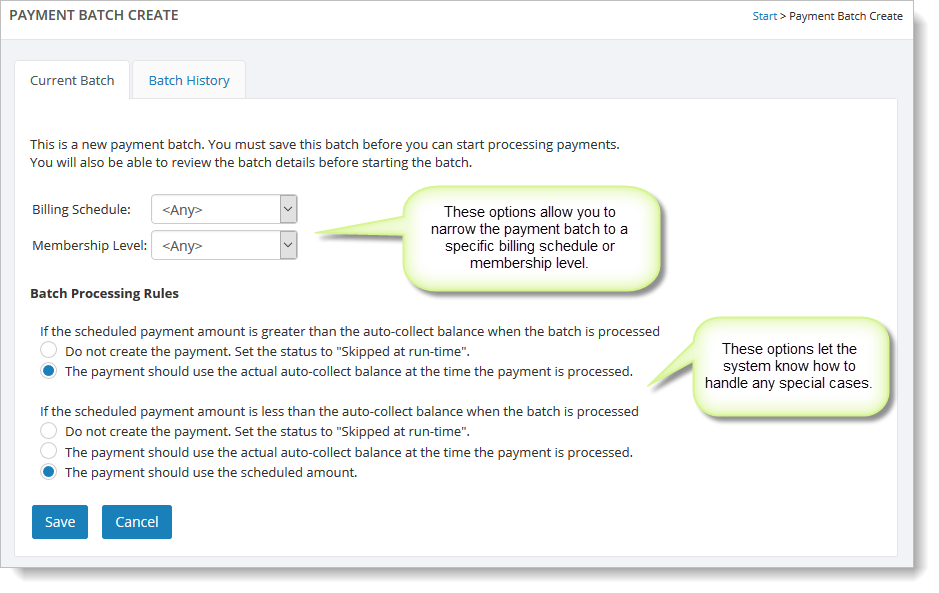
The default values for the "Batch Processing Rules" settings are:
- If the scheduled payment is greater than the amount unpaid when the payment is actually run, just run a payment for the smaller amount (the amount that is still unpaid).
- If the scheduled payment is less than than the amount unpaid when the payment is actually run, just run a payment for the scheduled amount. Any new charges will need to wait for the next batch.
Using the default values for these settings is a good idea if you are not sure how you would like this to work in your case.
Seeing a Summary of your New Payment Batch
As long as some unpaid fees are found with "auto-collect" enabled, you should see a summary of the batch you just created. It should look something like this:
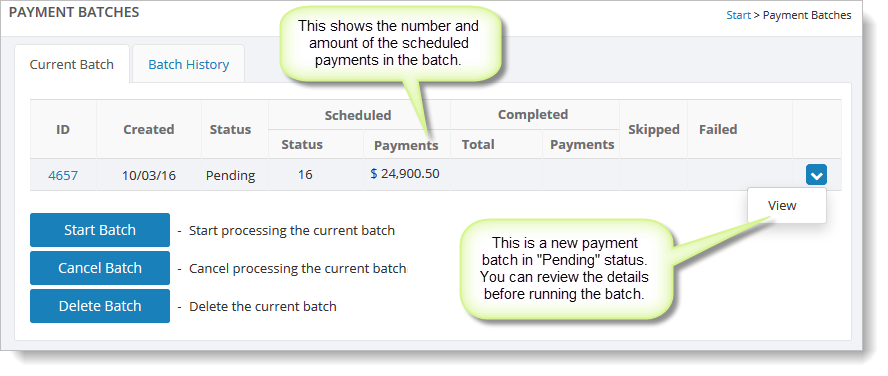
Note that the status of the batch is "Pending" and it shows 16 scheduled payments for a total of $24,900.50.
No payments have been run yet. This is just a summary of the batch you have created. No payments will be attempted until "Start Batch" is clicked.
You can cancel or delete this batch if you do not wish to continue at this time.
Reviewing the Payment Batch Details
After you select "Start Batch," you will see a page with the payment batch details. You should review these details and select the "I have reviewed this payment batch" checkbox at the bottom of the page.
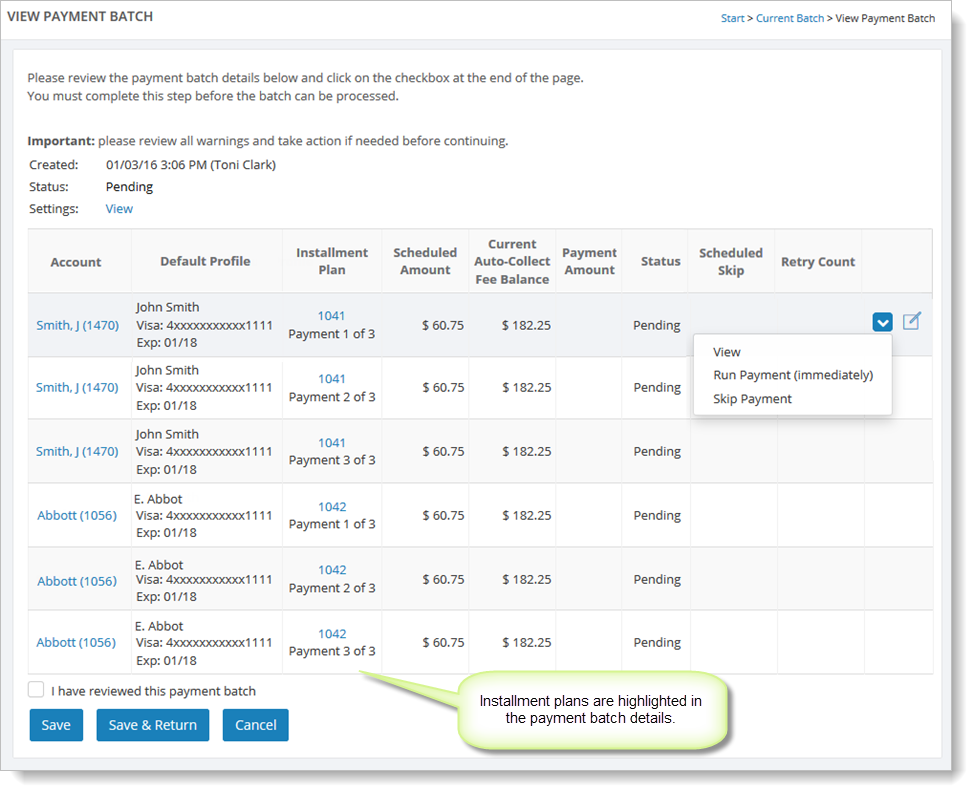
To remove any of these payments from the batch, you can set them to be skipped. Hover over a payment, and select the far right blue down arrow. Then click on "Skip Payment."
Running your Payment Batch
When you are ready to start running your payment batch, please see Running Payment Batches for more information.