How to allow a customer to log in to your site
For a customer to log in to your site, he or she will first need to have an account. If you wish to create the account yourself, please do that now by following the instructions on this page: How to add an account.
If your customer created the account on your website, the account will already exist and the customer should have been assigned the default Portal Access Level when the account was created. You can then just update the Portal Access Level for the account. If you're not sure what the Portal Access Level is, please take a look at How to control access to the portal.
In any event, to give one of your customers access to your website, first go to Manage > Accounts > Accounts.

If you can find the customer's account in the list by clicking on the Go button, then you can modify it by selecting the customer's name. (You can also hover over the customer and click on the far right blue down arrow to access the "Edit Account" command.) If you cannot find the account, you may need to add the account manually, as discussed above.
Once you have opened the account for editing, you will see a list of contacts for the account.
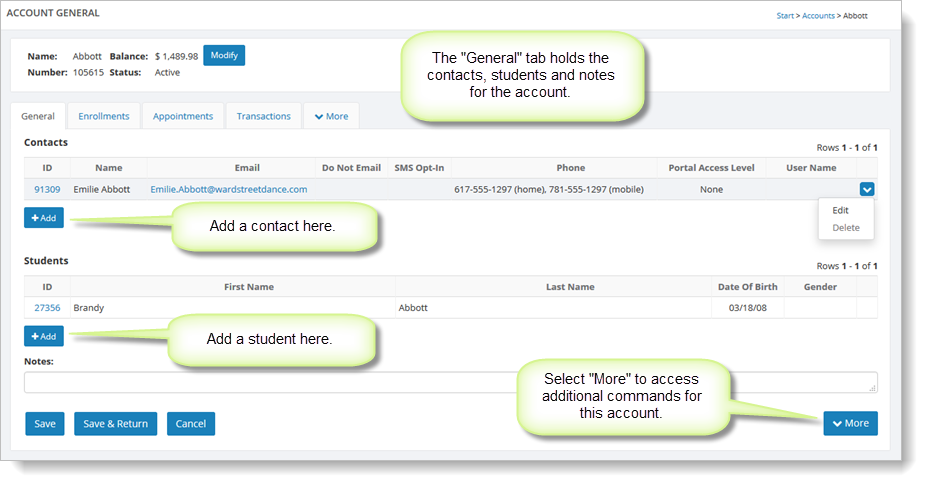
To update a contact, click on the "Edit" command for a contact, as shown above. If the contact you wish to give access to is not in the list, click on the appropriate "Add" button to add a contact or a student.
Whether you are adding or editing the contact, the fields on the form are the same:
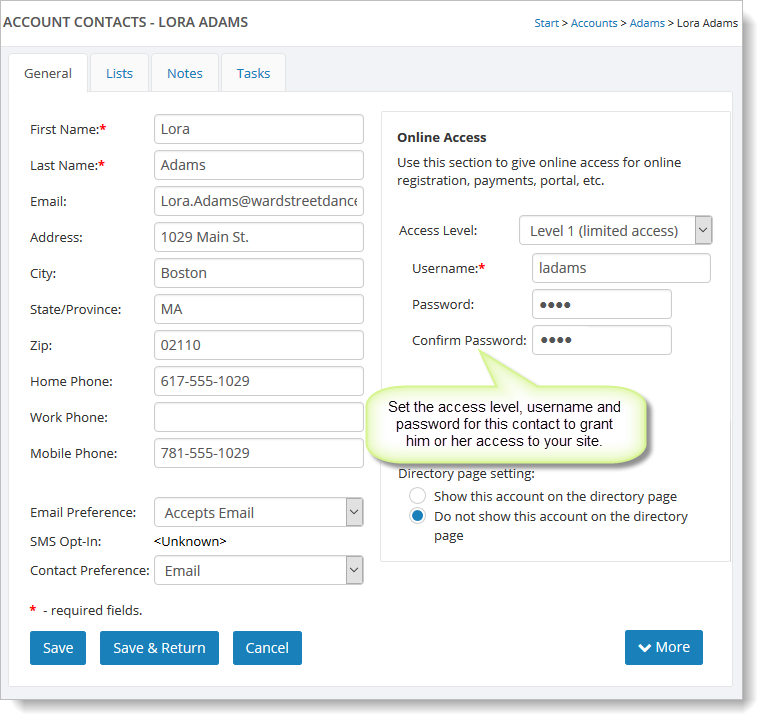
Fill in the Access Level for the portal, username and password for this user. If you are not sure what Access Level setting to choose, please take a look at
How to control access to the portal for more information. Your customer should now be able to login to your website and access your Customer Portal.