How to enter your classes
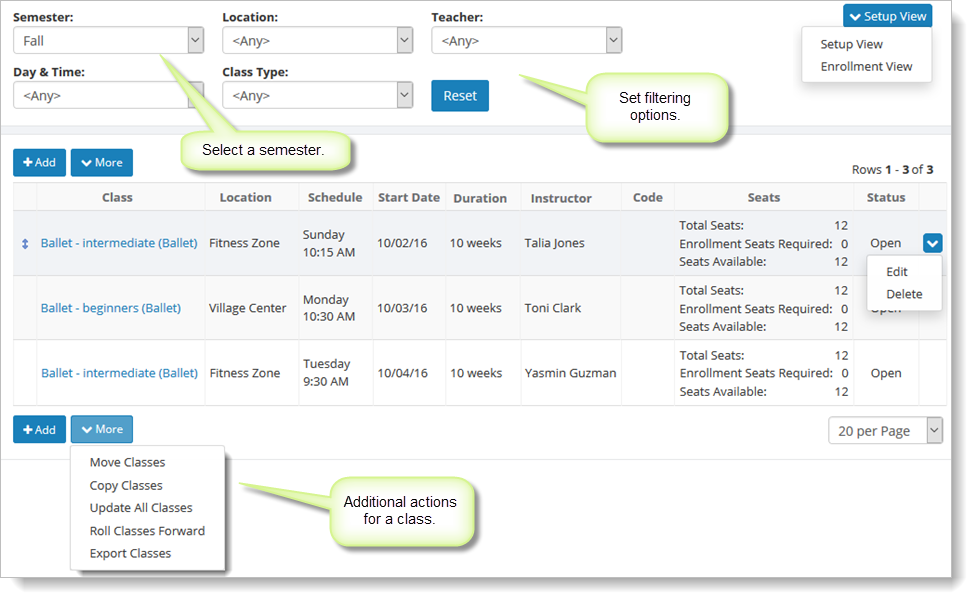
The classes grid shows a list of the classes you have defined for your business. To access your classes, go to Manage > Classes > Classes. This list will be empty until you have defined at least one class. The sample below shows a list with a few classes defined.

If you are using more than one semester, you'll need to make sure you select the semester you intend to work with from the list at the top of the page. If you have just one semester, this is done for you automatically.
You can use the up and down arrow buttons to change the order of your
classes. For this order to be respected on your pages, you must select the "Use custom sort order on
generated pages" option. To set this option, go to Website > Built-in Pages and select Classes followed by the Settings tab.
To edit or delete a class, hover over it and click the blue down arrow on the far right. This action displays a drop-down list with both the "Edit" and "Delete" commands. You can also edit a class by clicking its name. This action takes you to a class page with several tabs.
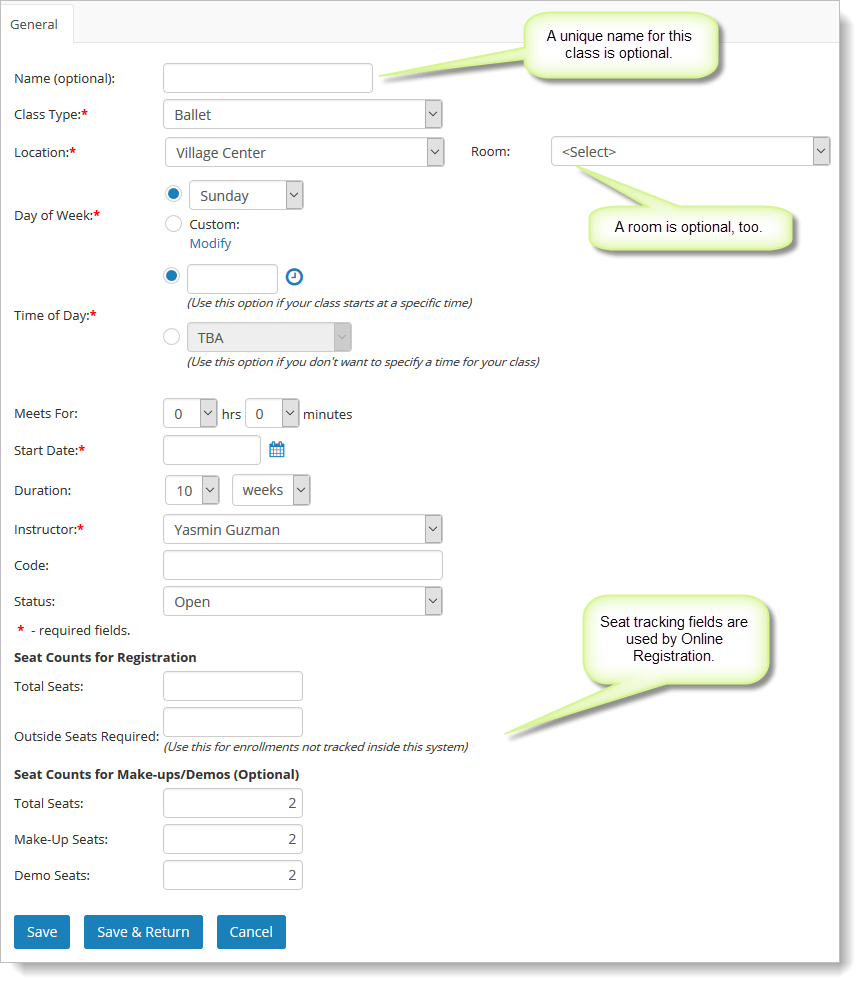
Click on the "Add" button to add a new class. You will be presented with a blank form to fill out.

Select the class type, location and teacher from the values you entered previously. Enter the day of week, time, duration and start date as is appropriate for the class. You can optionally enter a unique code for the class so you can identify it easily in emails and reports. This can be useful if you are exporting your registrations to a third-party accounting system.
Enter the full number of students you will accept in the class in the "Total Seats" field. Enter the number of people who have signed up outside of the system in the "Outside Registrants" field. You can update this field later if more people register for the class outside of the system.
If you no longer wish to accept registrations for this class, you can use the "Status" field to set the class to "Closed." Note that you can control how the system behaves when classes are marked closed in this way or are otherwise full. See the section on How to allow registration for full classes for more information on this.
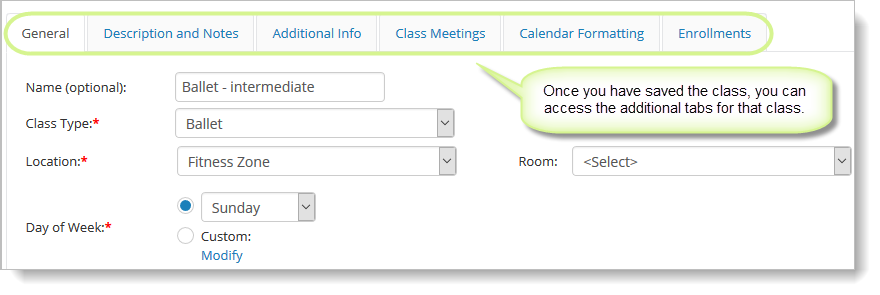
After you save the class, you will have access to additional information about the class via a set of tabs, shown here.
