Refunds Overview
Refunds in Main Street Sites are used to represent the returning of money to a customer.
Note: You must be using the Back Office Advanced mode to access all of the features described here. See Back Office Modes: Simple vs. Advanced for more information.
Refunds are used to "pay off" credits
You should create a refund when you need to refund money to your customers and you wish to keep a record of the original fees and payment as well as the subsequent refund. You could just delete the payment, but then you would have no record of the activity.
Instead, assume you have a fee and a payment for a customer. You then need to refund the full amount.
You would then need to add a credit to balance out the original fee, and then add a refund to pay off the credit.
Refunds are tracked in customer accounts
Each refund and credit is tracked in a customer's account. You can see refund activity by going to Manage > Accounts > Accounts. Once you locate and open the account, select the Transactions tab.
Refunds can only be entered manually
You can quickly enter your customers' cash and check payments from almost anywhere in the system (such as Manage > Accounts > Accounts or Manage > Activity > Enrollments).
Refund Example
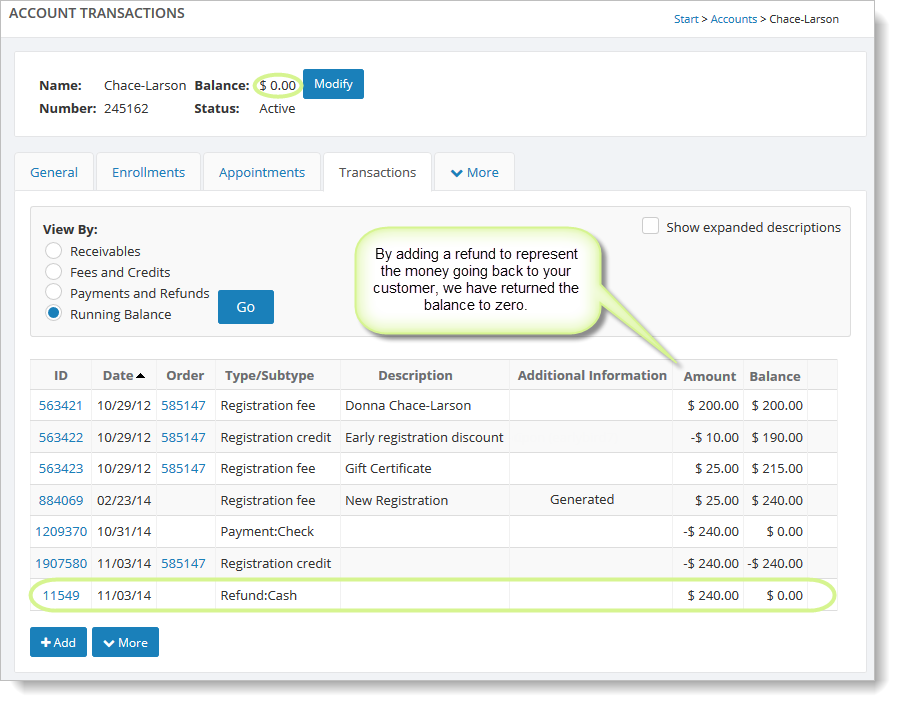
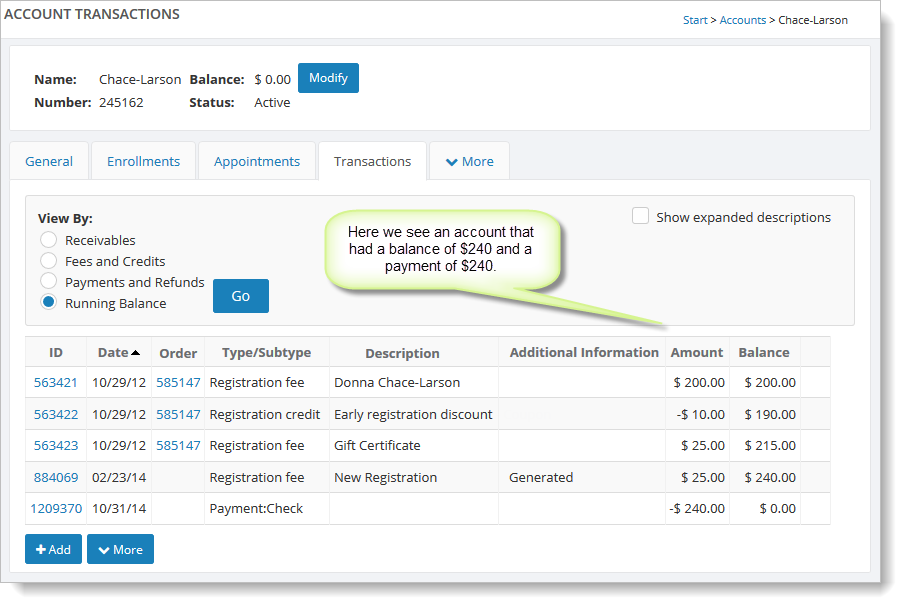
In this example, our customer has registered and paid for a class, but her plans changed, and we need to issue her a refund for $240.00.
We'll add a credit to her account to balance out the fees that no longer apply. This will create a credit balance of $240.00.
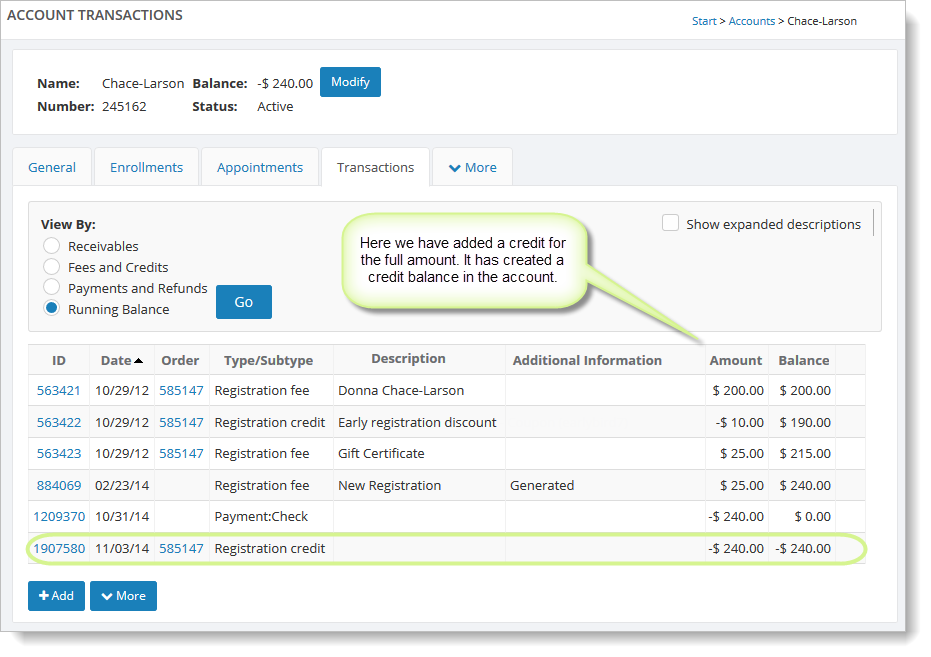
If we wanted to leave the credit balance in the account, we could leave it like this.
Note: Online Registration does not automatically apply credit balances to new registrations. When you create the credit, however, you can select an option to automatically apply the credit to the customer's next online registration.
We are going to return the money to the customer, so we will create a refund to represent this. In the next image, we have added the refund, and the account balance is now zero.