Back Office Processing Modes: Simple vs. Advanced
If you are using the Online Registration features of our Back Office service, you can choose how you wish to process online registrations.
By default, all accounts are operating in Simple Mode. Advanced Mode can only be activated by going to Setup > General > Settings and selecting the Advanced Mode option.
What is Simple Mode?
Simple Mode is based on this one idea: Simple Mode means you only want to use Main Street Sites Back Office to track your online registrations.
This means you are not trying to track enrollments and payments that didn't happen because of an online registration. You won't be tracking other enrollments, cash payments, refunds, etc.
In Simple Mode, you can manage all of your activity (registrations, enrollments and payments) from Manage > Activity > Enrollments.
As you would expect, some advanced Back Office features are disabled in simple mode. Some features are available, but won't be as useful without having all of your enrollments tracked in the system (like printing an Attendance Sheet, for example).
In Simple Mode, you will be able to:
- Track registration activity in Manage > Activity > Enrollments
- Export registration activity
- Track class levels and statuses
- Move a registration to a different class
- Keep a count of offline registrations using the "outside registrants" field on each class
- Update statuses for payments
- Update statuses for enrollments (Confirmed, Cancelled, Waitlist, etc.)
You will have access to these features, but they will not be as useful because not all of your students will be enrolled in the system:
- Class enrollment confirmation emails
- Current enrollments mailing lists and special customer portal access
- Reports: Attendance Sheets, Name Tags, Class Contacts
- Class List Export (for Music Together customers)
In Simple Mode, you will not be able to:
- Add additional enrollments
- Add additional fees or credits
- Add additional payments
- See account balances, enrollments, fees, payments, etc. in Manage > Accounts > Accounts
What is Advanced Mode?
Advanced Mode includes all of the features of Simple Mode and adds the ability to record any activity related to your registration process in the system.
Advanced Mode is based on the idea that your Main Street Sites account will track all activity for your registration process. This includes all registrations that do not get entered via the Online Registration system. In Advanced Mode, you will want to enter any "offline" registrations by creating enrollments.
In Advanced Mode enrollments, fees, credits, payments and refunds can be tracked for all of your accounts.
In Advanced Mode, you can:
- Track enrollments
- Add and view enrollments for any account
- Update enrollment statuses (confirmed, waitlist, dropped, etc.)
- Move enrollments between classes
- Record fees and payments for enrollments
- Send enrollment confirmations
- Send mailings based on current enrollments
- Allow currently enrolled families special access to your customer portal features
- Print attendance sheets, name tags, etc. for enrolled students
In Advanced Mode, you can:
- Track financial information
- Add and view fees, credits, payments and refunds for any account
- Process credit card payments using our built-in Virtual Terminal (requires a merchant account)
- View account balances for all of your accounts
- View all accounts with open balances within any range
Who should use Advanced Mode?
If you are looking for a better way to track your enrollments and related financial activity, you may wish to turn on Advanced Mode. If you want to use the advanced enrollment-based features listed above, you may also want to turn on Advanced Mode.
If you have a stable system in place that addresses all of your needs, you may prefer to use Simple Mode.
Turning on Advanced Mode
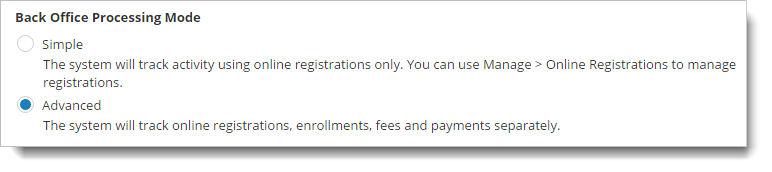
To turn on Advanced Mode, go to Setup > General > Settings, and click on the "Advanced" option shown below.
Note: When you use Advanced Mode, it is assumed that you will begin entering all of your customers' financial activity in Main Street Sites. You can use Advanced Mode without doing this, but your account balances will not be correct.
What do to after turning on Advanced Mode
When you first activate Advanced Mode in the middle of a semester, some of your account balances will not be correct. This will depend on timing factors such as where you are in your registration cycle.
We recommend that you review all account balances in Main Street Sites (by going to Manage > Accounts > Accounts) and compare them with your own list of accounts with open balances.
For every account with an open balance that is not represented in Main Street Sites, enter a fee to represent the open balance. See Adding, editing and deleting fees (from Manage > Accounts > Accounts) for instructions on how to enter fees for an account.
If an account has a credit balance, enter a credit to represent the credit. See Adding, editing and deleting credits (from Manage > Accounts > Accounts) for instructions on how to enter credits for an account.