Adding, editing and deleting payments (from Manage > Activity > Orders)
This article will discuss ways to add, edit and delete payments from Manage > Activity > Orders.
Payments can be entered, edited and deleted from several different places in Main Street Sites. For a full discussion of the options in this area, please see Adding, editing and deleting payments (general).
Note: You must be in the Back Office Advanced mode to access all of the features described here. Simple mode users will not be able to view and edit enrollments from this page. See Back Office Modes: Simple vs. Advanced for more information.
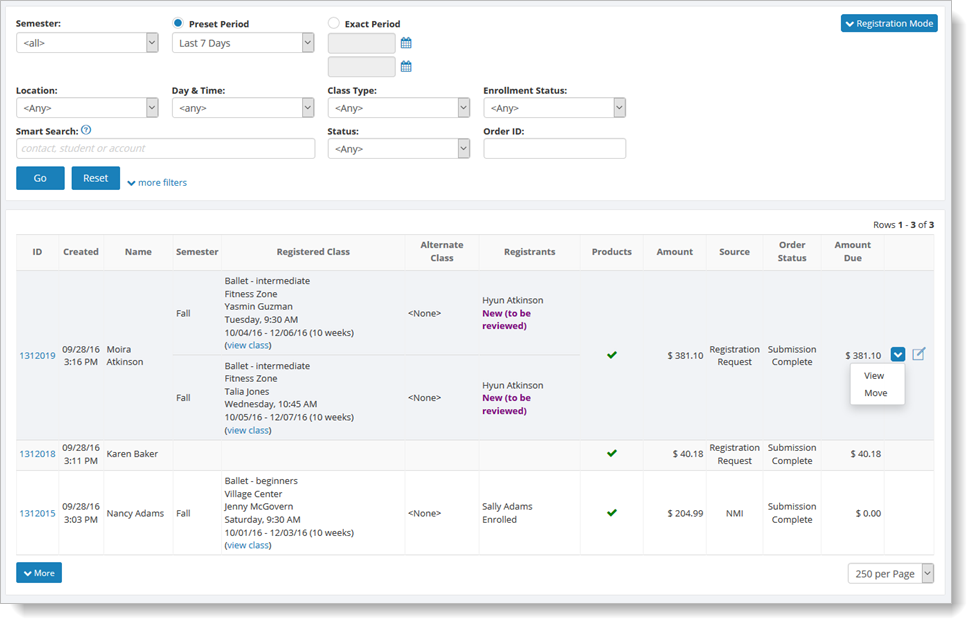
To add or edit payments from Manage > Activity > Orders, you must first click on "View" for an order, as shown here:
Select the "Linked Activities" tab. If the order was not successfully submitted on your website, you'll see the following message:

To submit the order, make any necessary changes to the options and click
on "Submit the order." The enrollments and fees will be created
automatically for the order. Payments will be created automatically for
PayPal orders only; these payments will be created in the "Submission
Complete (manual)" status.
If an order doesn't have any fees yet, you will need to add fees for the order before you can add a payment. See Adding, editing and deleting fees (from Manage > Activity > Orders) for details on how to do this.
Once the fees have been created, you can add a payment. On the "Linked Activity" tab, for the relevant registration order, hover
over the far right blue down arrow. Select the "View" command, and you
will see a new, two-tabbed page:
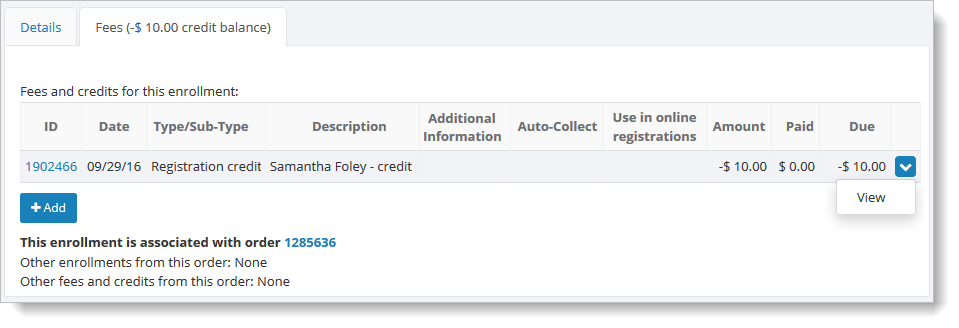
Click on the "Add" button and select the "Apply Payment" command.
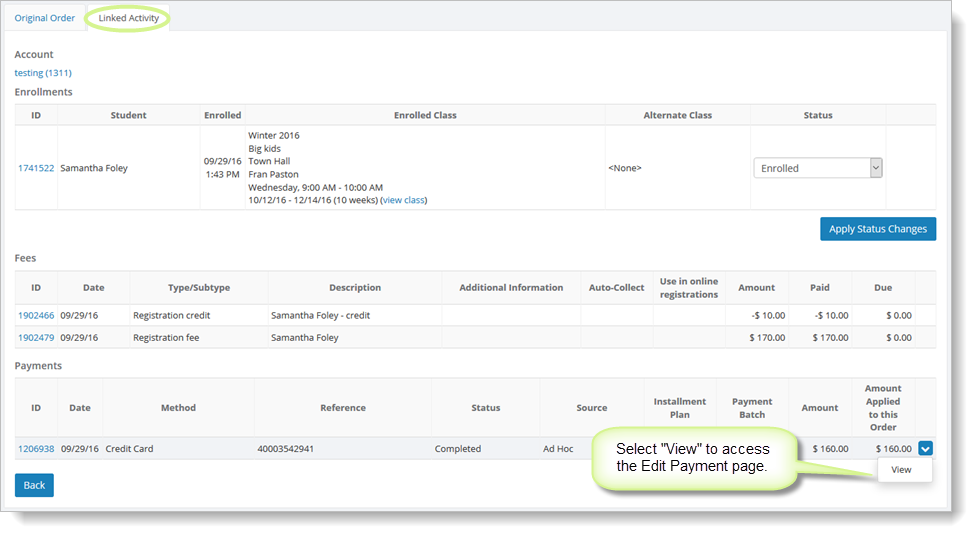
If you need edit a payment after it has been created, from the "Linked Activity" tab, hover over the payment, and click on the far right blue down arrow. Select the "View" command to access the Edit Payment page. The ability to edit a payment is particularly useful if you ever need to change the status of a PayPal payment.
To delete a payment, select its "View" command as shown above, and then follow the steps described in Adding, editing and deleting payments (general).