How to configure Facebook Tabs
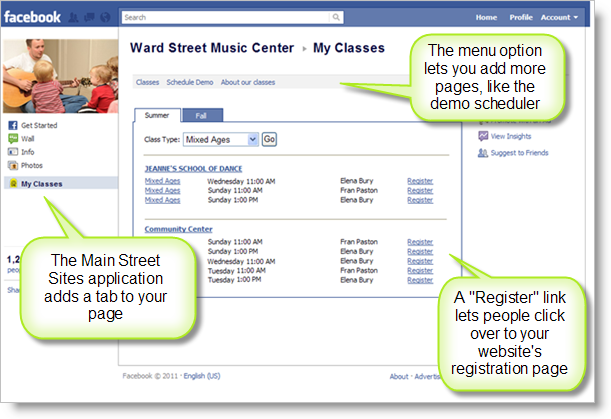
The Facebook Tabs feature uses the "Mainstreet Sites for Pages" Facebook application. The first step in using this feature is adding this application to your Facebook page and setting your Facebook page ID into the settings page. Please see How to add Main Street Sites for Pages for you Facebook page if you haven't already done this. This is what the "Mainstreet Sites for Pages" application looks like on your Facebook page:
The Facebook Tabs settings can be found by going to Website > Settings > Facebook tabs, as shown here:
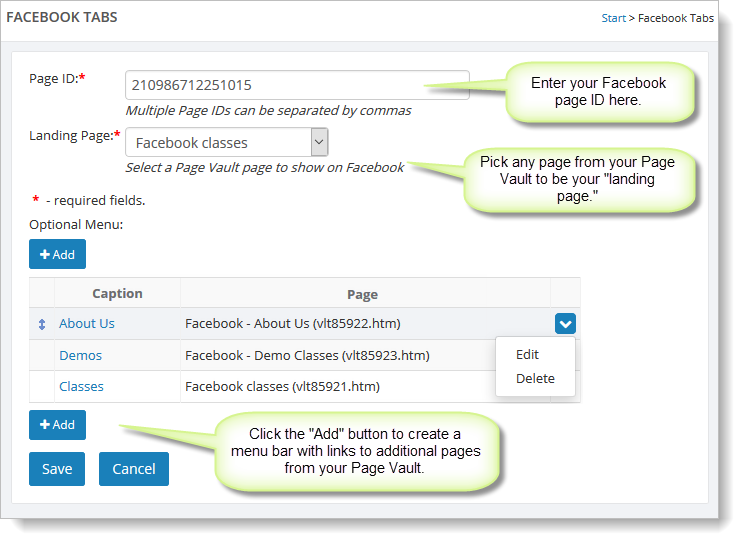
The settings for Facebook Tabs allow you to define the landing page and, if desired, a custom menu. The landing page is the page that will display when a user in Facebook clicks on your "My Classes" link. This can be set to any page in your Page Vault. Below we will show you how to create a new page for showing your class schedule. The custom menu can be used to add pages to your Facebook page.
How to create a Facebook classes page
Most Main Street Sites users will want to list their class schedule on their Facebook pages. This section will show you how to do that.
1) Create a component in the Component Vault.
Go to Website > Vaults > Component Vault, and click on the "Add" button. You'll see a blank form for entering information about the component.
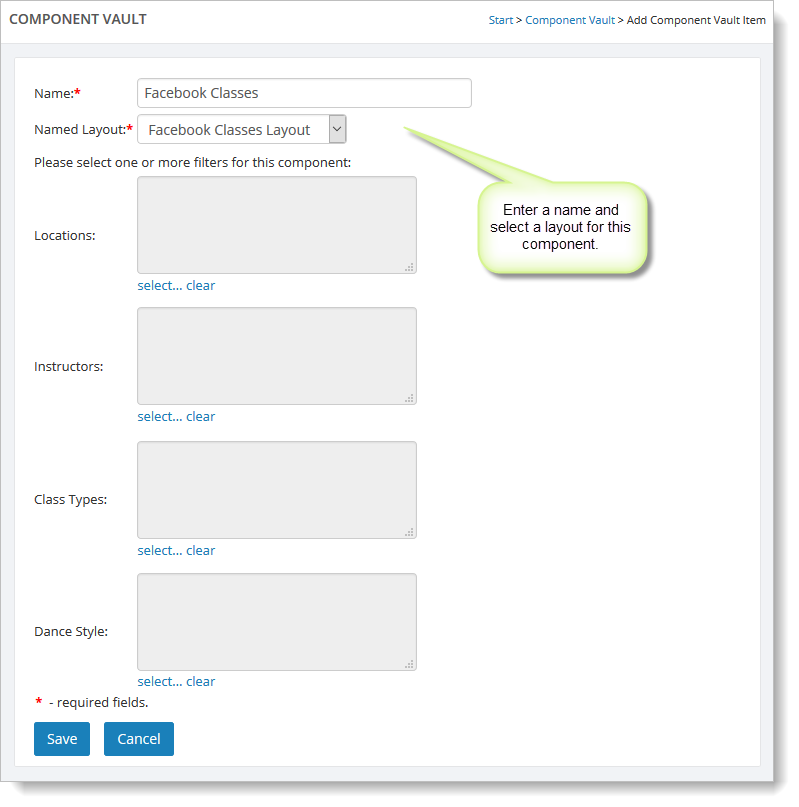
Enter "Facebook Classes" as the name of the component.
Select the "Facebook Classes Layout" named layout.
Save the new component.
You do not need to select a teacher or location for this component.
Advanced users can choose to create components that only apply to a certain location, teacher or class type.
2) Create a new page in your Page Vault.
Go to Website > Vaults > Page Vault, and click on the "Add" button.
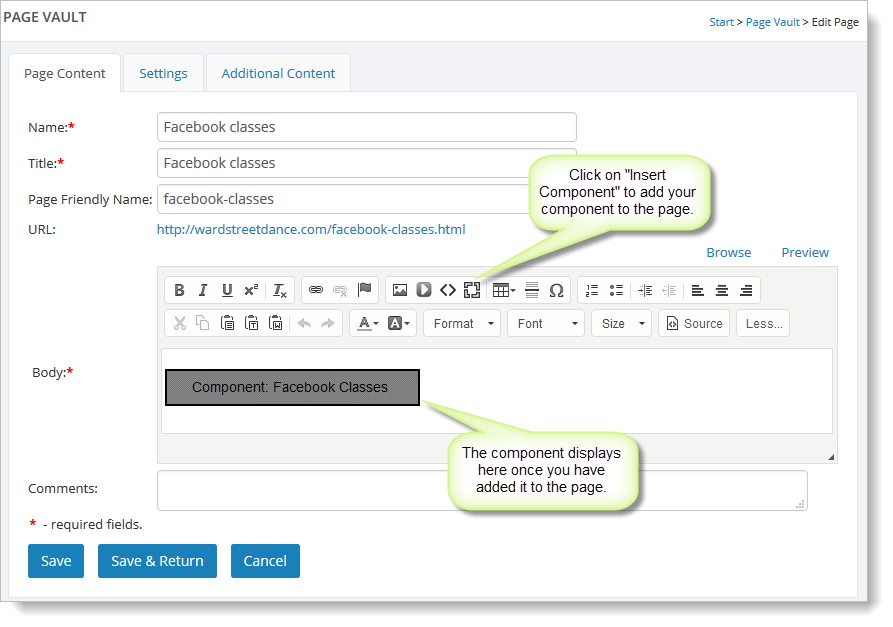
Enter "Facebook classes" for the page name and title.
Enter "facebook-classes" for the page-friendly name.
Click on "Insert Component" on the menu bar, and select the "Facebook Classes" component.
You can add additional content to this page if you'd like.
Save the new page.
3) Go to Facebook Tabs and pick the new page as your landing page.
Go to Website > Settings > Facebook Tabs.
Select the new "Facebook Classes" page as your landing page.
Note: You'll need to set the correct Facebook page ID for this feature to work. This is described in How to add Main Street Sites for Pages for your Facebook page. You can use a made-up value for now if you don't have your ID yet.
How to add a menu bar to your Facebook tab
Go to the "Optional Menu" section of the Facebook Tabs page.
Click on the "Add" button as shown in the previous image.
From here you can pick any page in your Page Vault. You cannot select any built-in pages.
You can add as many menu items as you'd like.
How to change the look of your class listings in Facebook
To change how your classes look, you'll need to update the "Facebook Classes Layout" named layout. To do this, go to Website > Settings > Named Layouts, and select "Facebook Classes Layout" in the "Name" column. From there you can add, edit and remove the columns in the layout. You can also change the sorting, grouping and filtering options for the page.
Refer to the instructions in How to use named layouts for classes for more information.
How to add a page for your Demo Scheduler listings
Adding a page for your demo scheduler is much the same as the process indicated above for adding a classes page. However, in this case, when you create the component, you'll select "Default Demo Selector Layout" from the "Name" column.
You may wish to add a new layout for the demo scheduler to better suit the width limitations in Facebook.
To create a new layout, go to Website > Settings > Named Layouts, click on the "Add" button. Select "Demo Class Selector" as the type, and add the columns you'd like to use.
Refer to the instructions in How to use named layouts for demos for more information.