Online Registration Overview
Main Street Sites online registration is a powerful feature of the Back Office service. The first time a customer registers, an account is automatically created for them in your Back Office database. Enrollments are created for each order. You can decide how those enrollments should be treated (if they need review or not, for example). Online registration can use almost any merchant account via the supported payment gateways (Network Merchants and Authorize.net). PayPal's "Standard Website Payments" interface is a supported option as well. Support for the eWay gateway is also available for UK and Australian customers. See Payment Processing Options for more details on payment gateways.
Below are some of the highlights of online registration.
When you use online registration, your customers can do things like this...
- Register and pay online with credit and debit cards
- Save credit card information for future use (or for use in recurring billing)
- Select installment plans (or deposit-only plans)
- Register multiple students for multiple classes on the same order
- Enter coupons
- Add products from the "featured products" page to their orders
- Login with a username and password, create a new account or register without having a username
- Select the correct price from a list (when a customer needs to select between two or more options)
...and you can do things like this:
- Require customers to create a billing profile when they register
- Require an upfront payment for a registration
- Allow customers to register for full classes
- Require customers to pick a second choice for a class
- Add custom fields to the registration form
- Put customers in "waiting list" status
- Enter fees and discounts that get applied automatically to customer orders
- Set up pro-rated prices and early registration discounts
- Enter a list of "where did you hear about us" options for customers to pick from
- Require customers to accept your terms and conditions
- Decide how you'd like your classes to display on the registration form
- Set prices by location
- Accept registrations for multiple semesters at once
- Have different prices for each semester
- and much more...
Note: Main Street Sites websites not using Back Office have access to a limited set of the online registration features.
A Brief Tour of Online Registration
The following images will show you what the online registration process looks like in Main Street Sites. This process is the same whether you are using Back Office with a Main Street Sites website or with your own website. The images are from a representative test site. We did not try to show all of the options mentioned in the lists above.
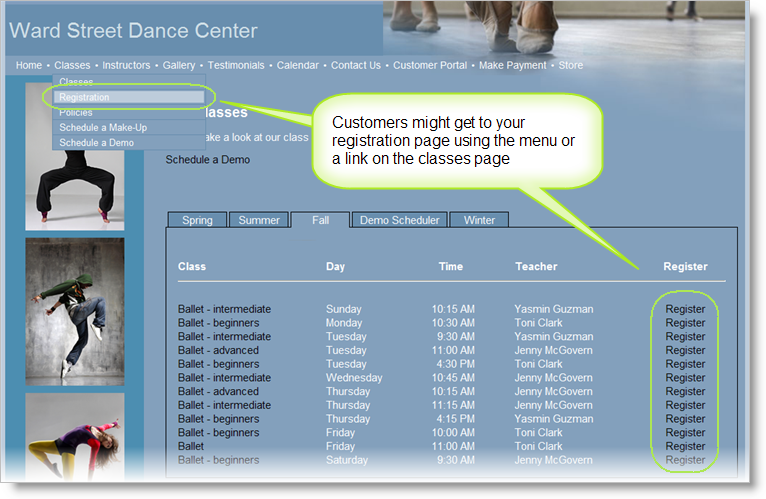
Most customers link to their online registration page from their menu. If you use the Main Street Sites "Classes" page, you can use automatically generated "register" links like the ones shown below. These "register" links can appear on your Facebook page if you use the Main Street Sites Facebook Tabs app.
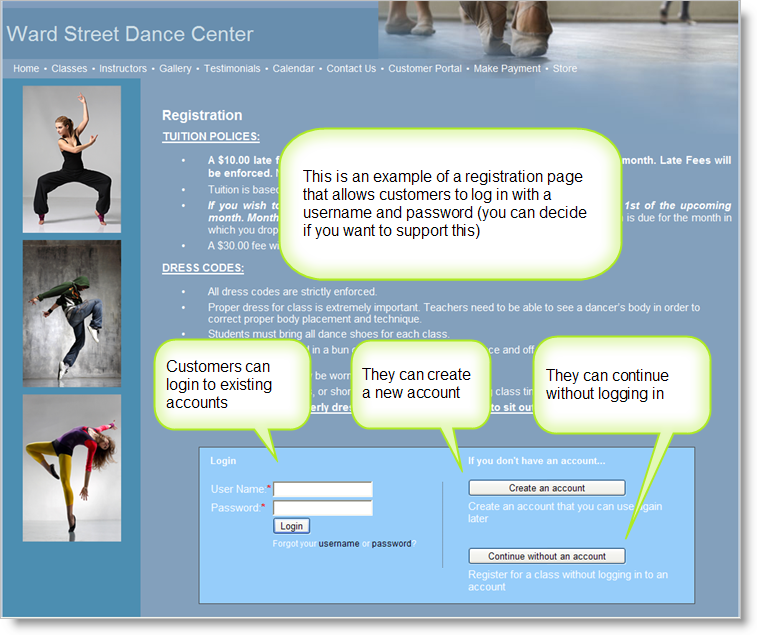
The registration page shown below has a section that allows the customer to log in to an existing account or to create a new account. This is optional. Your registration page can skip this section if you'd like it to.
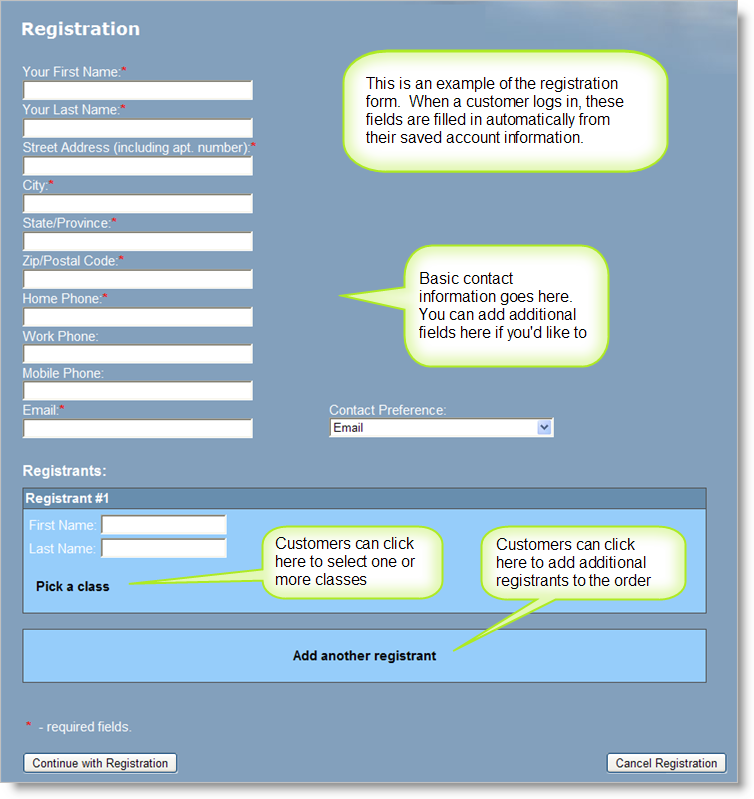
The registration form has a standard set of contact information fields, plus a section for student information. You can add additional fields to this form by going to Website > General > Built-in Pages, selecting the Registration page to edit and clicking on the "Custom Fields" tab.
You can have required "Date of Birth" fields for students if you wish. You can even remove the student section entirely. (The system can be set to use the contact information in lieu of a student if you'd prefer.)
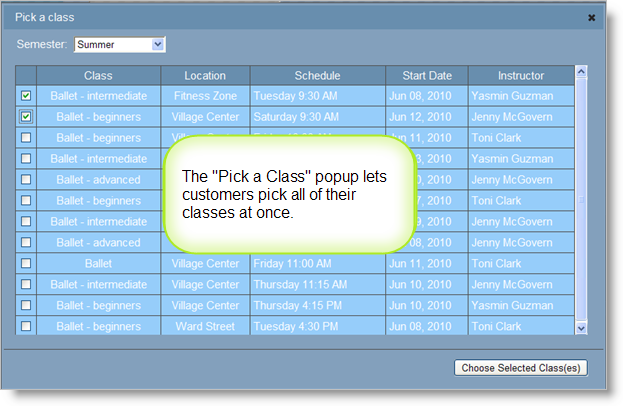
The example we're showing here uses the "Pick a Class" popup window shown below. This lets customers easily select multiple classes if they wish to. There is an alternate registration interface that shows the classes without the popup window if you'd prefer. You can select your preferred registration interface by going to Website > General > Built-in Pages, selecting the Registration page to edit and clicking on the "Settings" tab.
You can control the columns and filters that display when classes are selected. This is done by going to Website > Settings > Named Layouts. See the Named Layouts Overview for more information on this.
Once a class has been selected, your customer will be asked to select a price for that class. If only one price is available, this is done automatically. Automatic fees and discounts will display at this time and coupons can be entered.
Registration prices can be assigned based on a class's class type. Prices can also be assigned based on a class's location. See Registration Pricing for more details on setting up prices, fees and discounts.
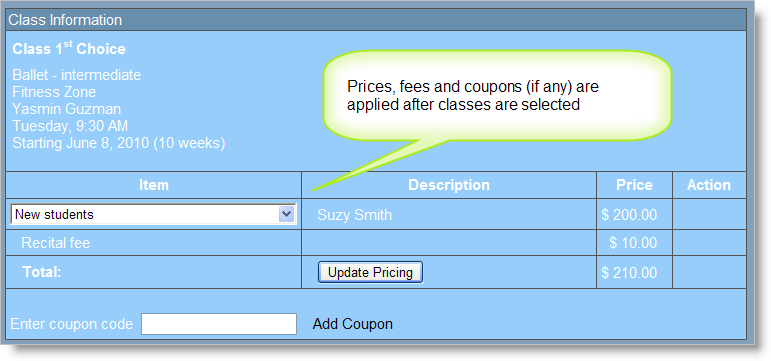
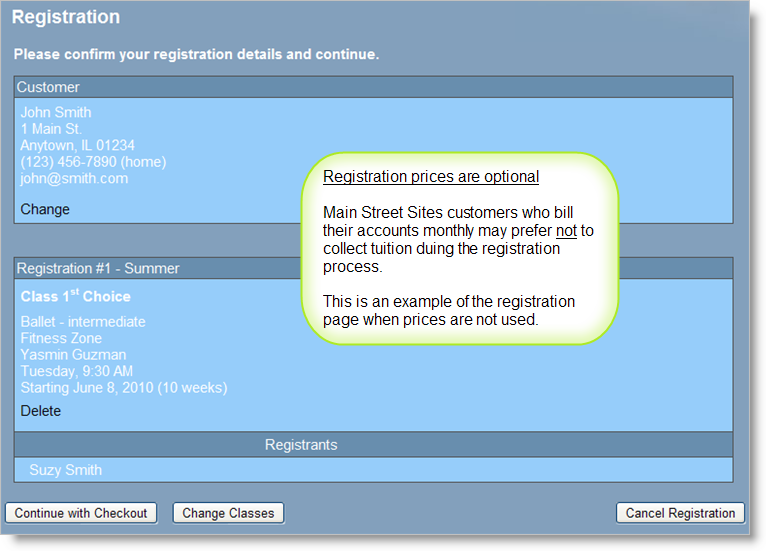
Important note: Registration prices are not a necessity of online registration. You can let customers register for classes without selecting prices and without making an upfront payment. This is often done when customers will be billed periodically for classes (typically monthly).
We typically recommend that customers using monthly billing not try to configure the registration page to calculate the correct monthly price for each class.
To allow online registration without using prices, simply do not assign a price set to the semester (at Setup > General > Semesters). This can be done on a class-by-class basis as well. Below is an example of a registration page where no prices are used:
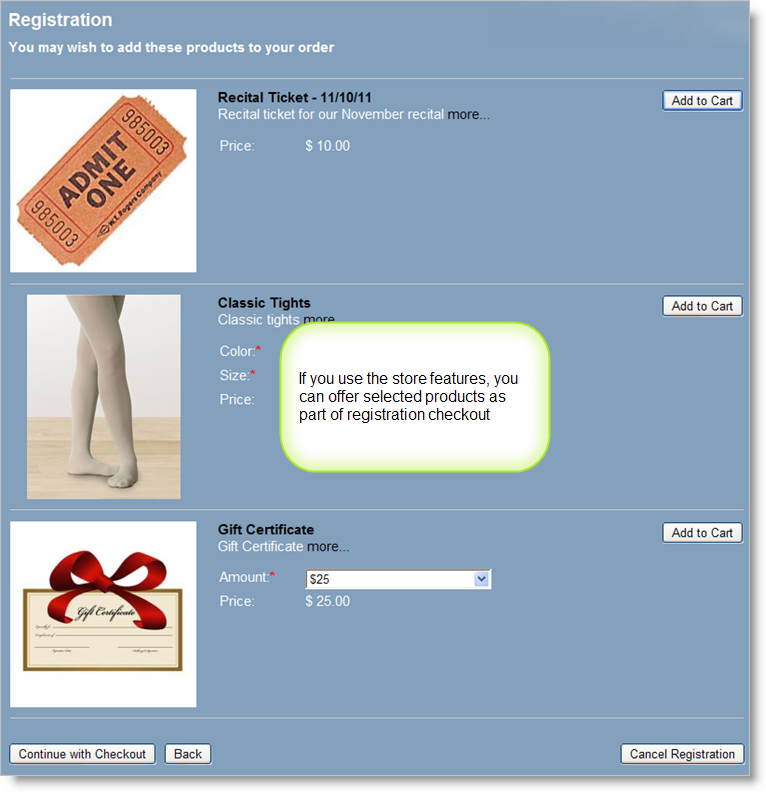
The "Featured Products" page is another optional aspect of online registration. You can offer products on this page as part of registration checkout process if you wish to do so.
See the Store Overview for more information on setting up products.
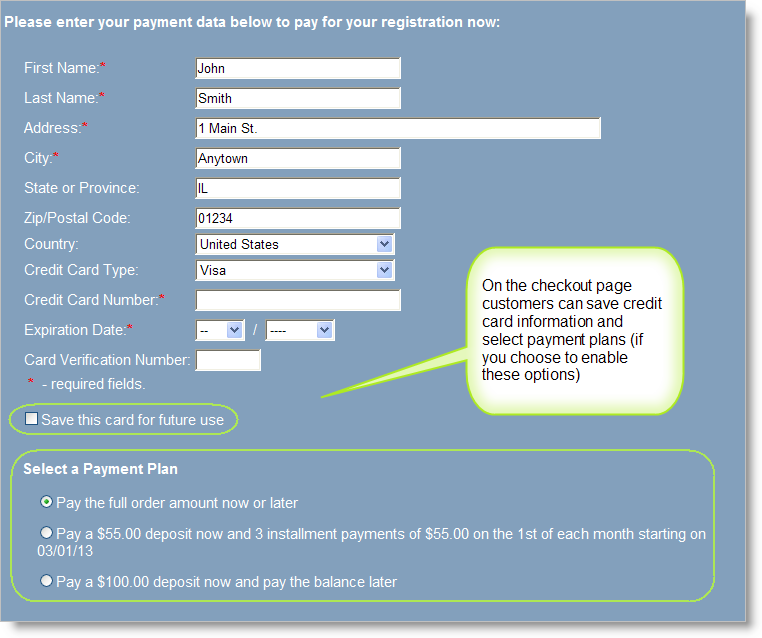
This page collects payment information. It also allows users to save credit card information for use in recurring billing and/or future registration orders. This example shows that installment plans have been defined for this account. Learn about installment plans at the Installment Plans Overview.
When the registration has been completed, your customers will be shown a final page. They can print out a printer-friendly copy of their order confirmation if they'd like to. Email notifications are also sent out when a registration is submitted.
You can customize the email notifications by going to Communications > Settings > Notification Templates. Also, you can add additional text to all of the pages shown here by going to Website > General > Built-in Pages, selecting the Registration page and clicking on the "Additional Content" tab.