Working with classes overview
If you have website with Main Street Sites, the classes page on your website will show your class schedule. If you are using Online Registration or Make-Up Scheduler, the information you enter for your classes will use these features as well.
When you define your classes, you will use the information you have already provided for Teachers, Locations and Class Types. If you haven't already set up Teachers, Locations and Class Types, please go and do this first. See How to enter teachers to add teachers, How to enter locations to add locations, and How to enter class types to add class types. If you want to assign rooms to your classes, you can add them as part of your locations.
To access your classes, go to Manage > Classes > Classes. The classes grid allows you to pick a semester, and then add, edit or delete classes within that semester.
Note: Your display may look different based on the options you have selected for your account.
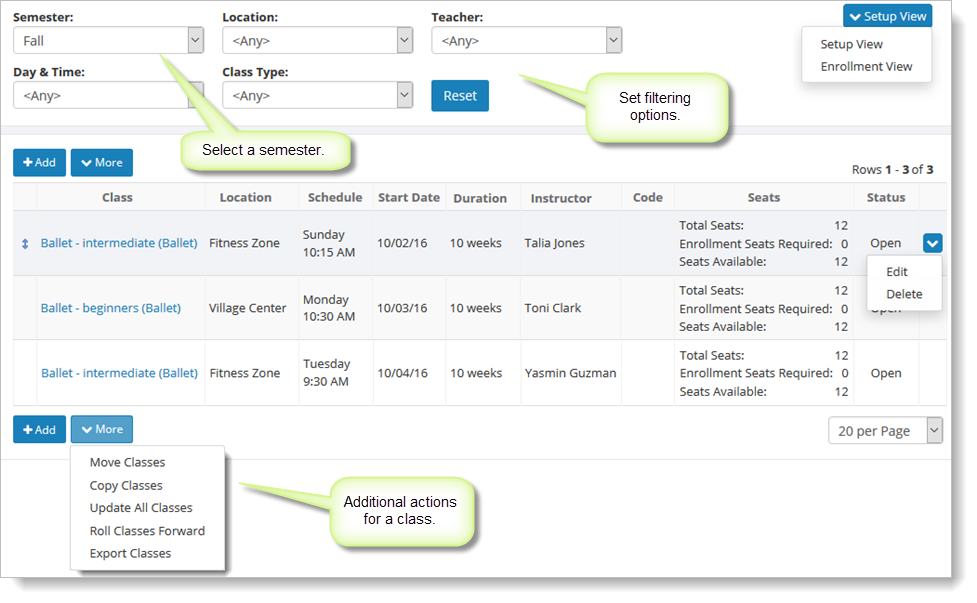
Notice that the "More" button provides access to additional functions you can perform on your classes. The most important function here is the "Roll Forward" feature. That feature allows you to advance your classes from one semester to the next. Please see How to roll forward for details on how that function works. The other functions are also covered later in Manage > Classes > Classes section.
To learn how to enter your class schedule, please see How to Enter Classes.