How to use the content editor
Main Street Sites supports powerful word processor-like editing tools
for your website content. This tutorial will discuss how you can use
these features to format the content on your site.
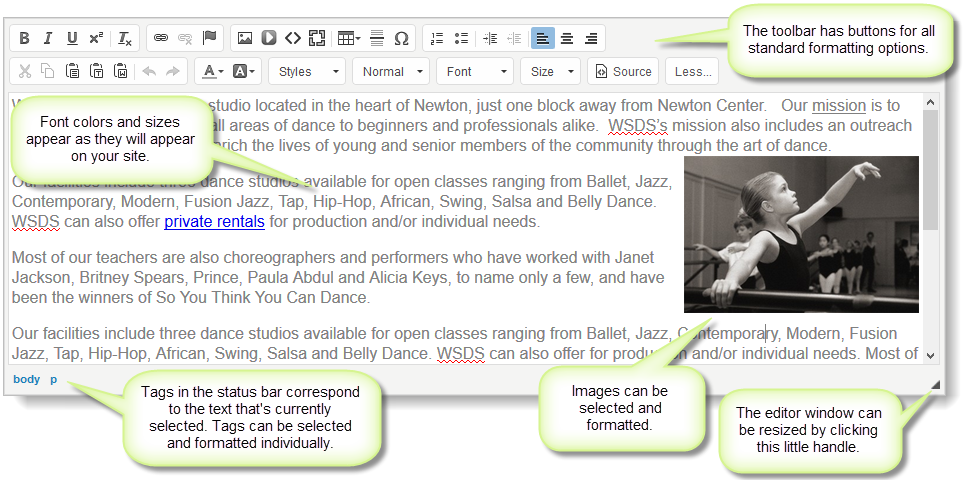
When you work with content, you can use the single-row toolbar or the double-row toolbar:
Clicking on the
"More" button displays additional buttons on the toolbar. You now have
the ability to add tables, format table rows and
columns, plus a few other useful tools. (The rest of the toolbar area
remains the same as the one-row toolbar.)

You can switch back and forth between the single-row and double-row toolbars depending on what your formatting needs are.
Content editor features
Use
the toolbar to format your text, paragraphs, and so forth directly in
the text editing window. This gives you a better idea of how your
website will look.
To use the new editor, just type in some text as you would normally
do. The toolbar works much as it would with any word processor or
spreadsheet.
Toolbar buttons
Use the new toolbar buttons to apply formatting to your text and/or paragraphs. Below is a list of the buttons and their functions. You can follow any of the links for more information about how to use the function.
An asterisk ( * ) next to the function means it is available on the double-row toolbar (i.e., you must select the "More" button to access it).
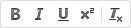 |
Bold, Italic, Underline, Superscript, Remove Format
|

|
Left, Center, or Right Justify
|
 |
Link, Unlink*, Create Anchor*
|
 |
Cut, Copy, Paste, Paste as Plain Text, Paste from Word
|
 |
Insert Picture
|
 |
Undo, Redo
|
 |
Insert Media
|
 |
Text Color*, Text Highlight Color*
|
 |
Insert Snippet
|
 |
Block & Inline Styles*
|
 |
Insert Component
|
 |
Paragraph Styles*
|
 |
Insert Table
|

|
Font Selector*
|
 |
Insert Horizontal Line*
|

|
Font Size*
|
 |
Insert Symbol*
|
 |
HTML Toggle Display *
|
 |
Numbered List, Bulleted List
|
 |
Display Double-Row Toolbar
|
 |
Increase Indent, Decrease Indent
|
 |
Display Single-Row Toolbar*
|
Tips for working with the content editor
Formatting paragraphs vs. formatting text
Some of the formatting tools apply formatting at the paragraph level and some tools format only the current selected text (if any). This is an important distinction.
Examples:
Indenting, outdenting, alignment and paragraph styles are applied at the paragraph level.
Bold, italic, underline, font name, size and color are applied to the current selection.
Link breaks versus returns
Because many of these formats and styles are applied at the paragraph
level, it is useful to be able to control when a new paragraph is
started.
- To create a new paragraph, just press the Enter/Return key.
- To start a new line without creating a new paragraph, press SHIFT-Enter instead.
Pasting in text
If you are pasting in text from Microsoft Word, you will get better results if you use the "Paste from Word" function instead of the regular "Paste."
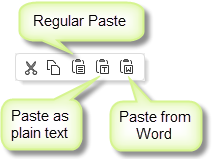
Regular Paste—
Note: If you prefer to use the keyboard Ctrl-V command to paste in text,
it has the same functionality as the regular Paste button.
Paste as plain text—
Paste from Word—
Removing formatting from text
To quickly return text to its original "plain" state, highlight it by selecting it, and click on the "Remove Format" button.
 Remove Format
Spacing versus indenting
When positioning text in the content editor, avoid using the space bar to indent or otherwise position text. This can cause the text to be positioned strangely when it's actually viewed on your website.
This is because websites automatically adjust text when a browser window is made larger or made smaller. Keep in mind that on your website, your content will resize to fit the window, so don't assume one static width.
If you need to indent text, place your cursor within the text that you want to indent, and click the "Increase Indent" button. Using this command affects the entire paragraph.
 Increase Indent
To remove indenting, place your cursor within the indented text, and click the "Decrease Indent" button.
 Decrease Indent
Numbered lists and bulleted lists
Instead of manually numbering a list of items, you can select the text that you want numbered and click the "Insert Numbered List" button. This action automatically numbers the list for you.
 Insert Numbered List
You can also select text and click the "Insert Bulleted List" button.
 Insert Bulleted List
To remove this formatting, select the text and click the same button again.
A quick note on snippets in the content editor
Snippets appear as little boxes in the new content editor. You can
click on them, cut and paste them, delete them, etc. You can use the
snippet dropdown list (shown in the toolbar image below) to insert them
into your content.
If you have been using snippets to insert HTML formatting codes, you
will see your snippets, but you will not see the effects of your
formatting. You can leave your snippets as they are or delete them and
use the toolbar to add bold, underline, etc. directly to your content.
Your converted snippets will look something like this:
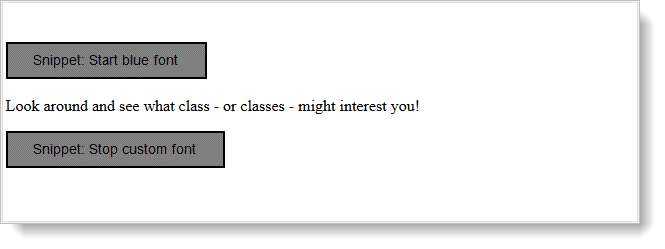
You can leave them as they are or replace them with formatting, like this:
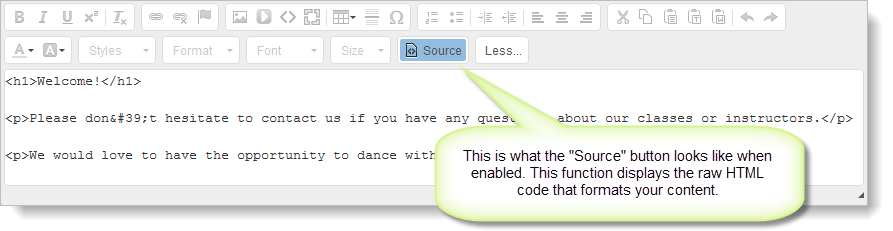
Using the HTML (Source) view
To see the raw, underlying format of your content, click on the"Source" button.
You can make changes to the HTML in this mode. You can save your changes in
either mode.
WARNING: This option must be used with care. It is very
easy to make mistakes when editing raw HTML. Editing your HTML
improperly may make your web page unreadable and require you to
delete the content you are working on and start again.
To return to the normal view, click the "Source" button again.
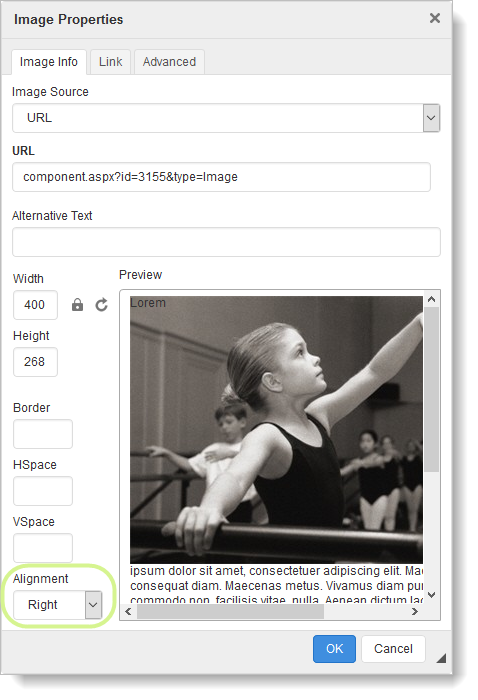
Formatting images: Getting text to flow around images
By default, text does not flow around the images you add from the
Image Vault. To get this effect for your pages, just double-click on an
image to get the image formatting dialog box (shown below). Set the
alignment of the image to left or right and the text will flow to the
opposite sides of the page. There are many other formatting options you
can explore on this dialog as well.
Advanced Content Editing
More on working with images
To stretch or shrink an image, first you need to click on it. After
you click on an image, you'll see "handles" like those shown below:
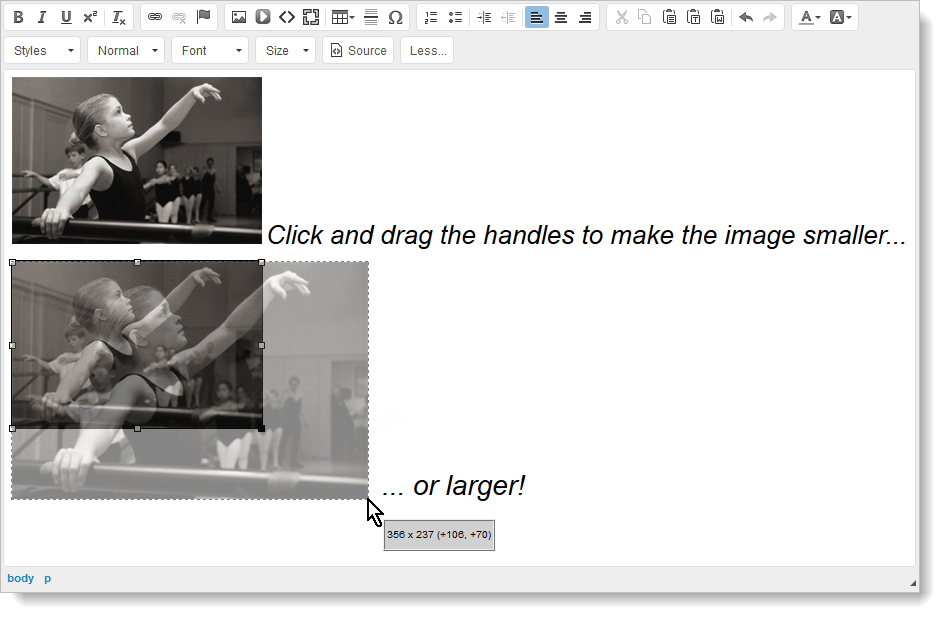
Note: Not all browsers give you "handles" to drag. If this is the case, you can double-click on the image and use the "Width" and "Height" fields to manually set the image size.
Important note: This ability to stretch and shrink images does not affect the true size of the image. This
means that it is still not a good idea to upload very large images such
as those from digital cameras and scanners. Those images should still
be resized before being displayed on your pages. See the Advanced Image Uploader feature for help in resizing your images.
Using tables
A table is a very useful tool for organizing information on web
pages. You can put anything into the cells of a table – text, images,
links, even another table. Click on the Insert Table button to add an
empty table to your content.
Insert Table
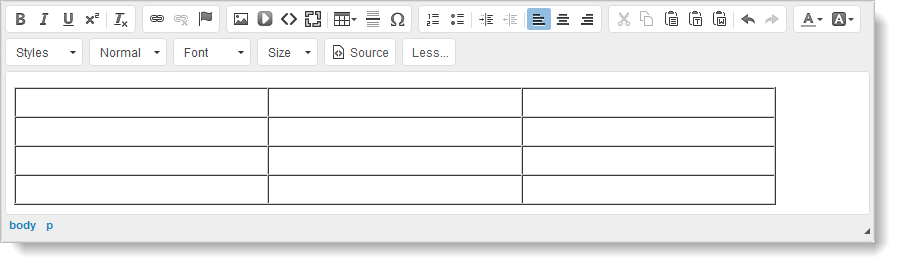
You will be able to select as many rows and
columns as you would like your table to have. Once inserted, it will
looks something like this:
Click on table to get handles for it, and you can resize it.
To format the table, you can access more commands by right-clicking in one of the table cells.
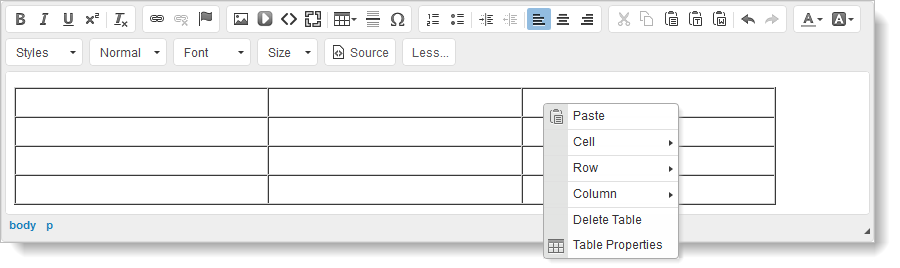
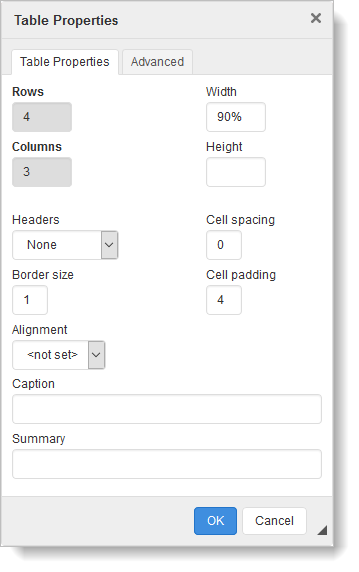
The right-click commands enable you to add, delete and format columns and rows. You can also access the Table Properties, which gives you even more options for formatting the table.
You can experiment with these options to get the best result for
your pages. Here is how the same table looks if you centered all of the
text in the table cells and changed the cells' background color:
